
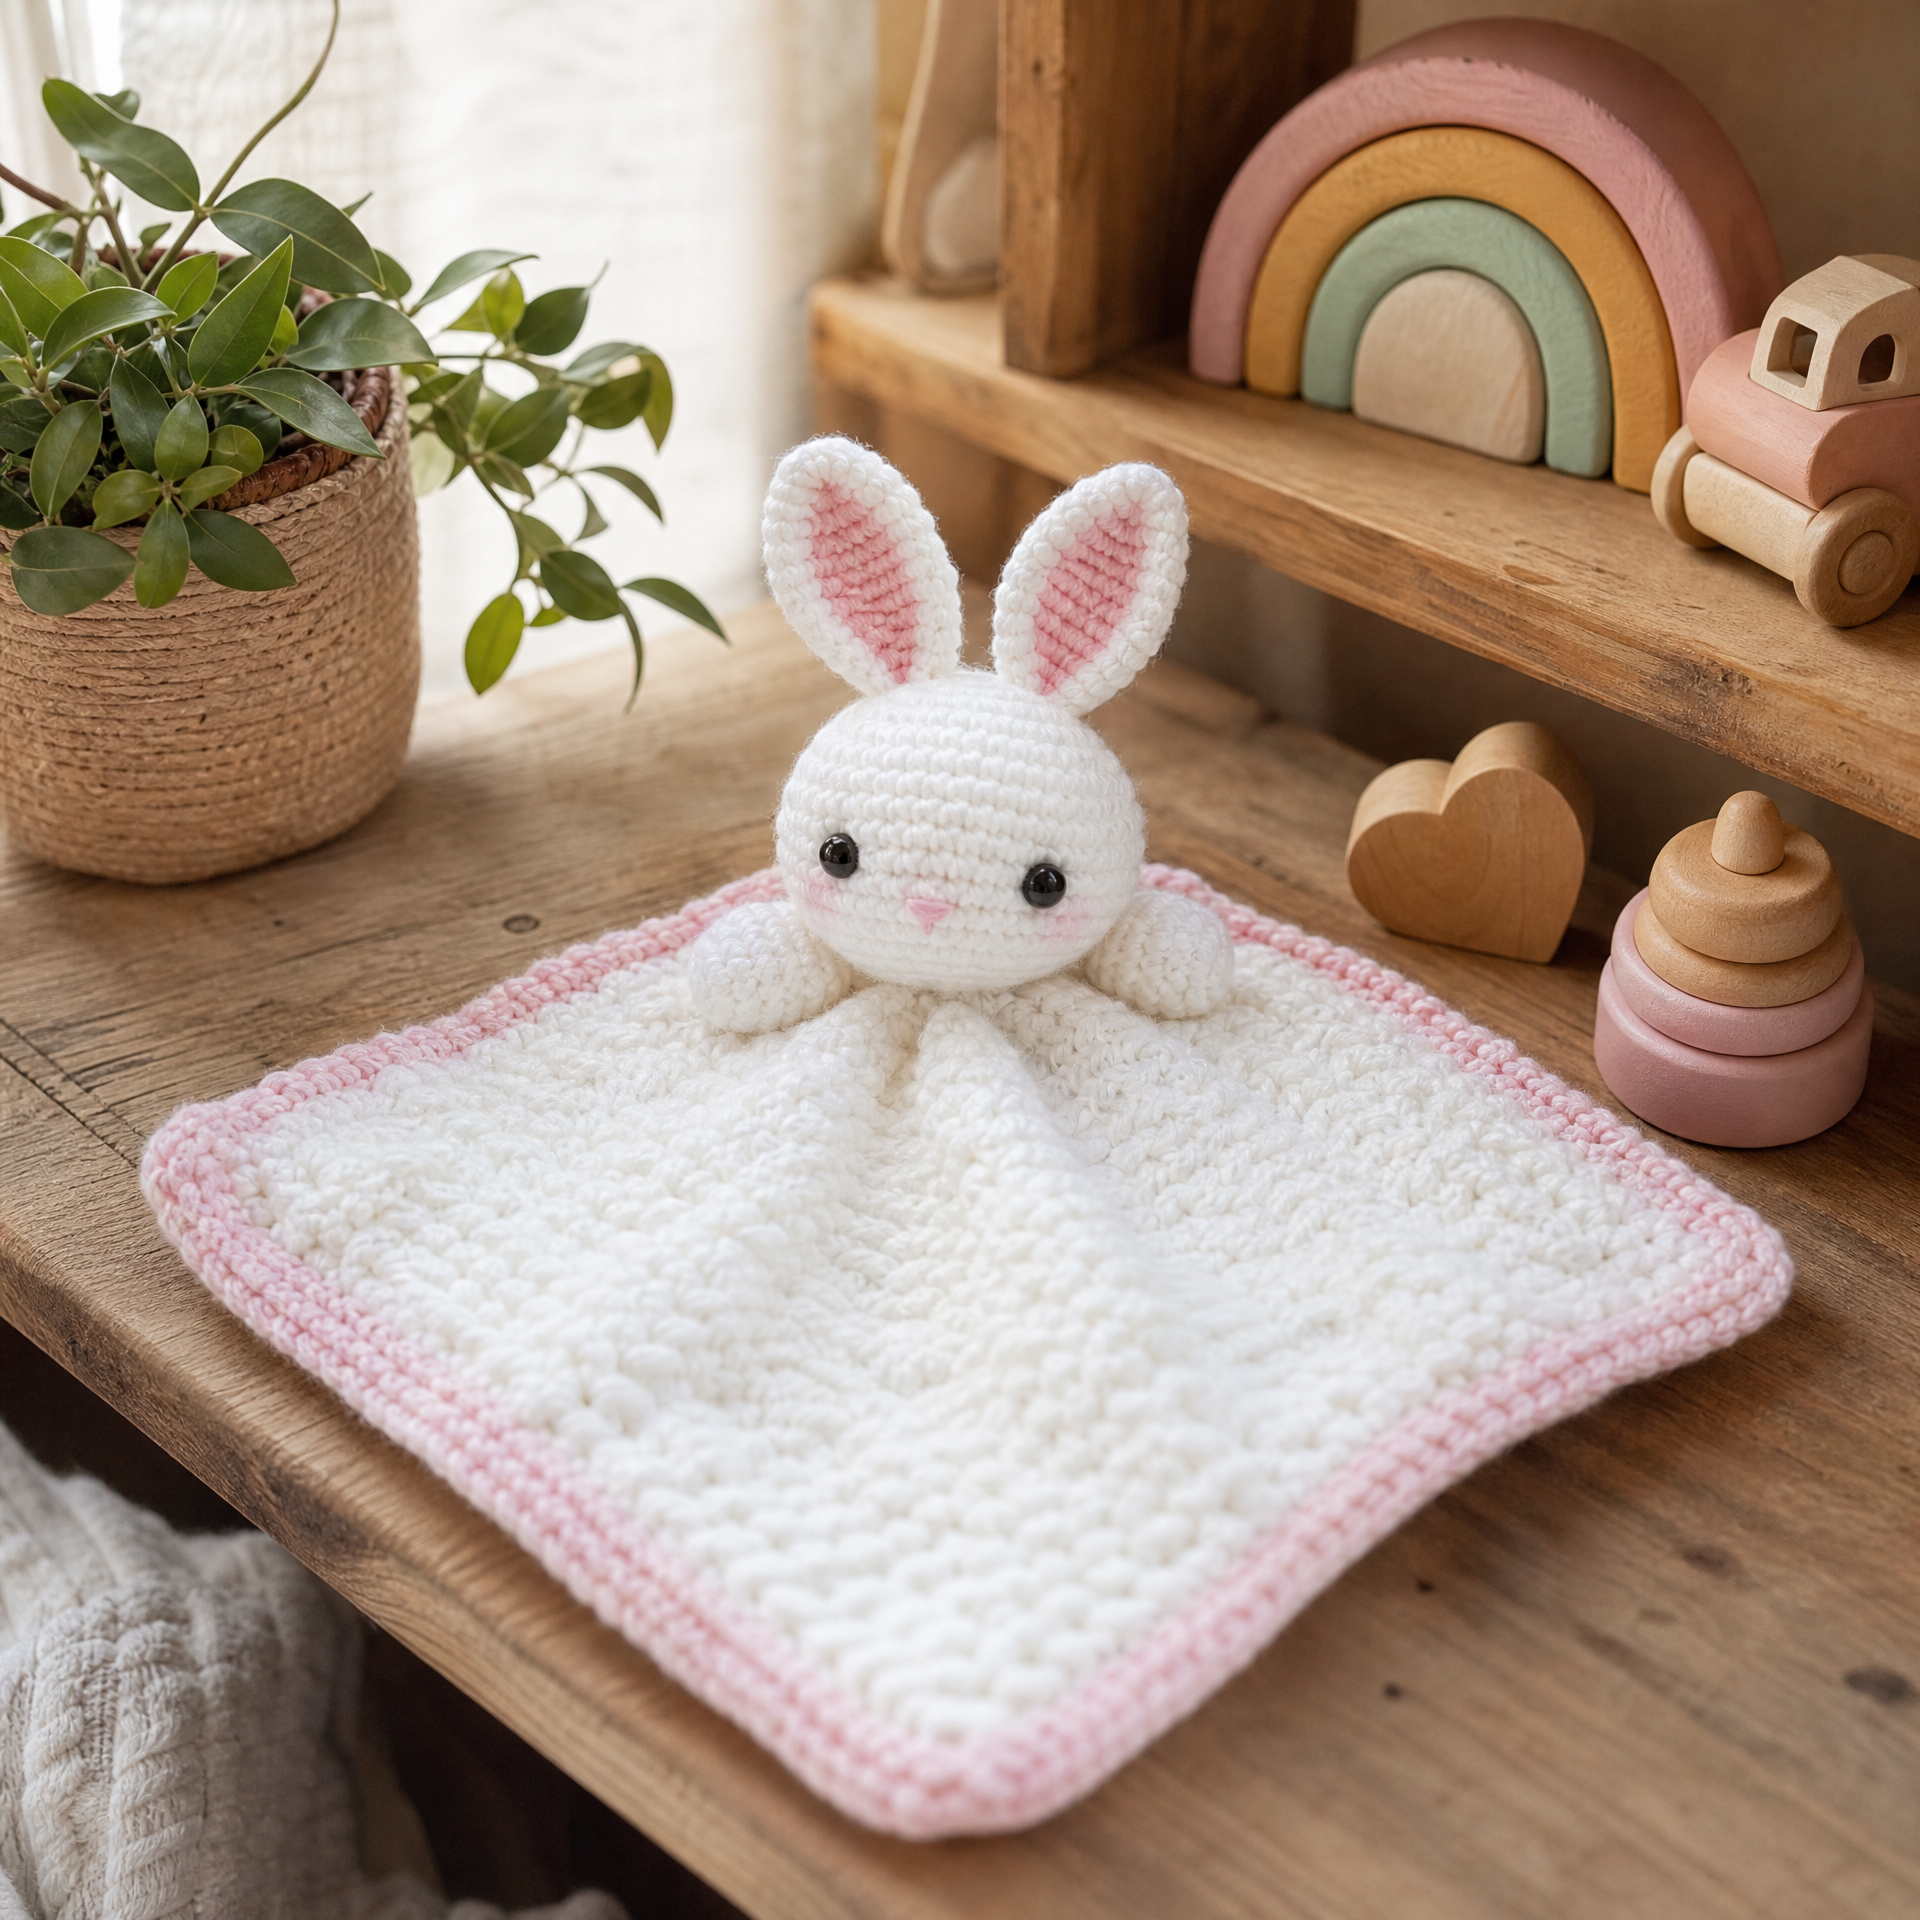
I still remember the first baby lovey I ever made. My best friend was expecting her first little one, and I wanted to give her something truly handmade and special. I had been crocheting for a few years at that point, but I had never tried combining an amigurumi head with a security blanket before. Honestly, I was a little nervous. I made a couple of awkward attempts before I landed on a design I was really proud of, and that little bunny lovey ended up being one of the most loved gifts I have ever given. Since then, I have made this pattern probably a dozen times, for baby showers, new nieces and nephews, and even a few custom orders. Every single one has turned out adorable, and I am so excited to finally share the full pattern here on Crochet at Home. Let me walk you through everything you need to know.
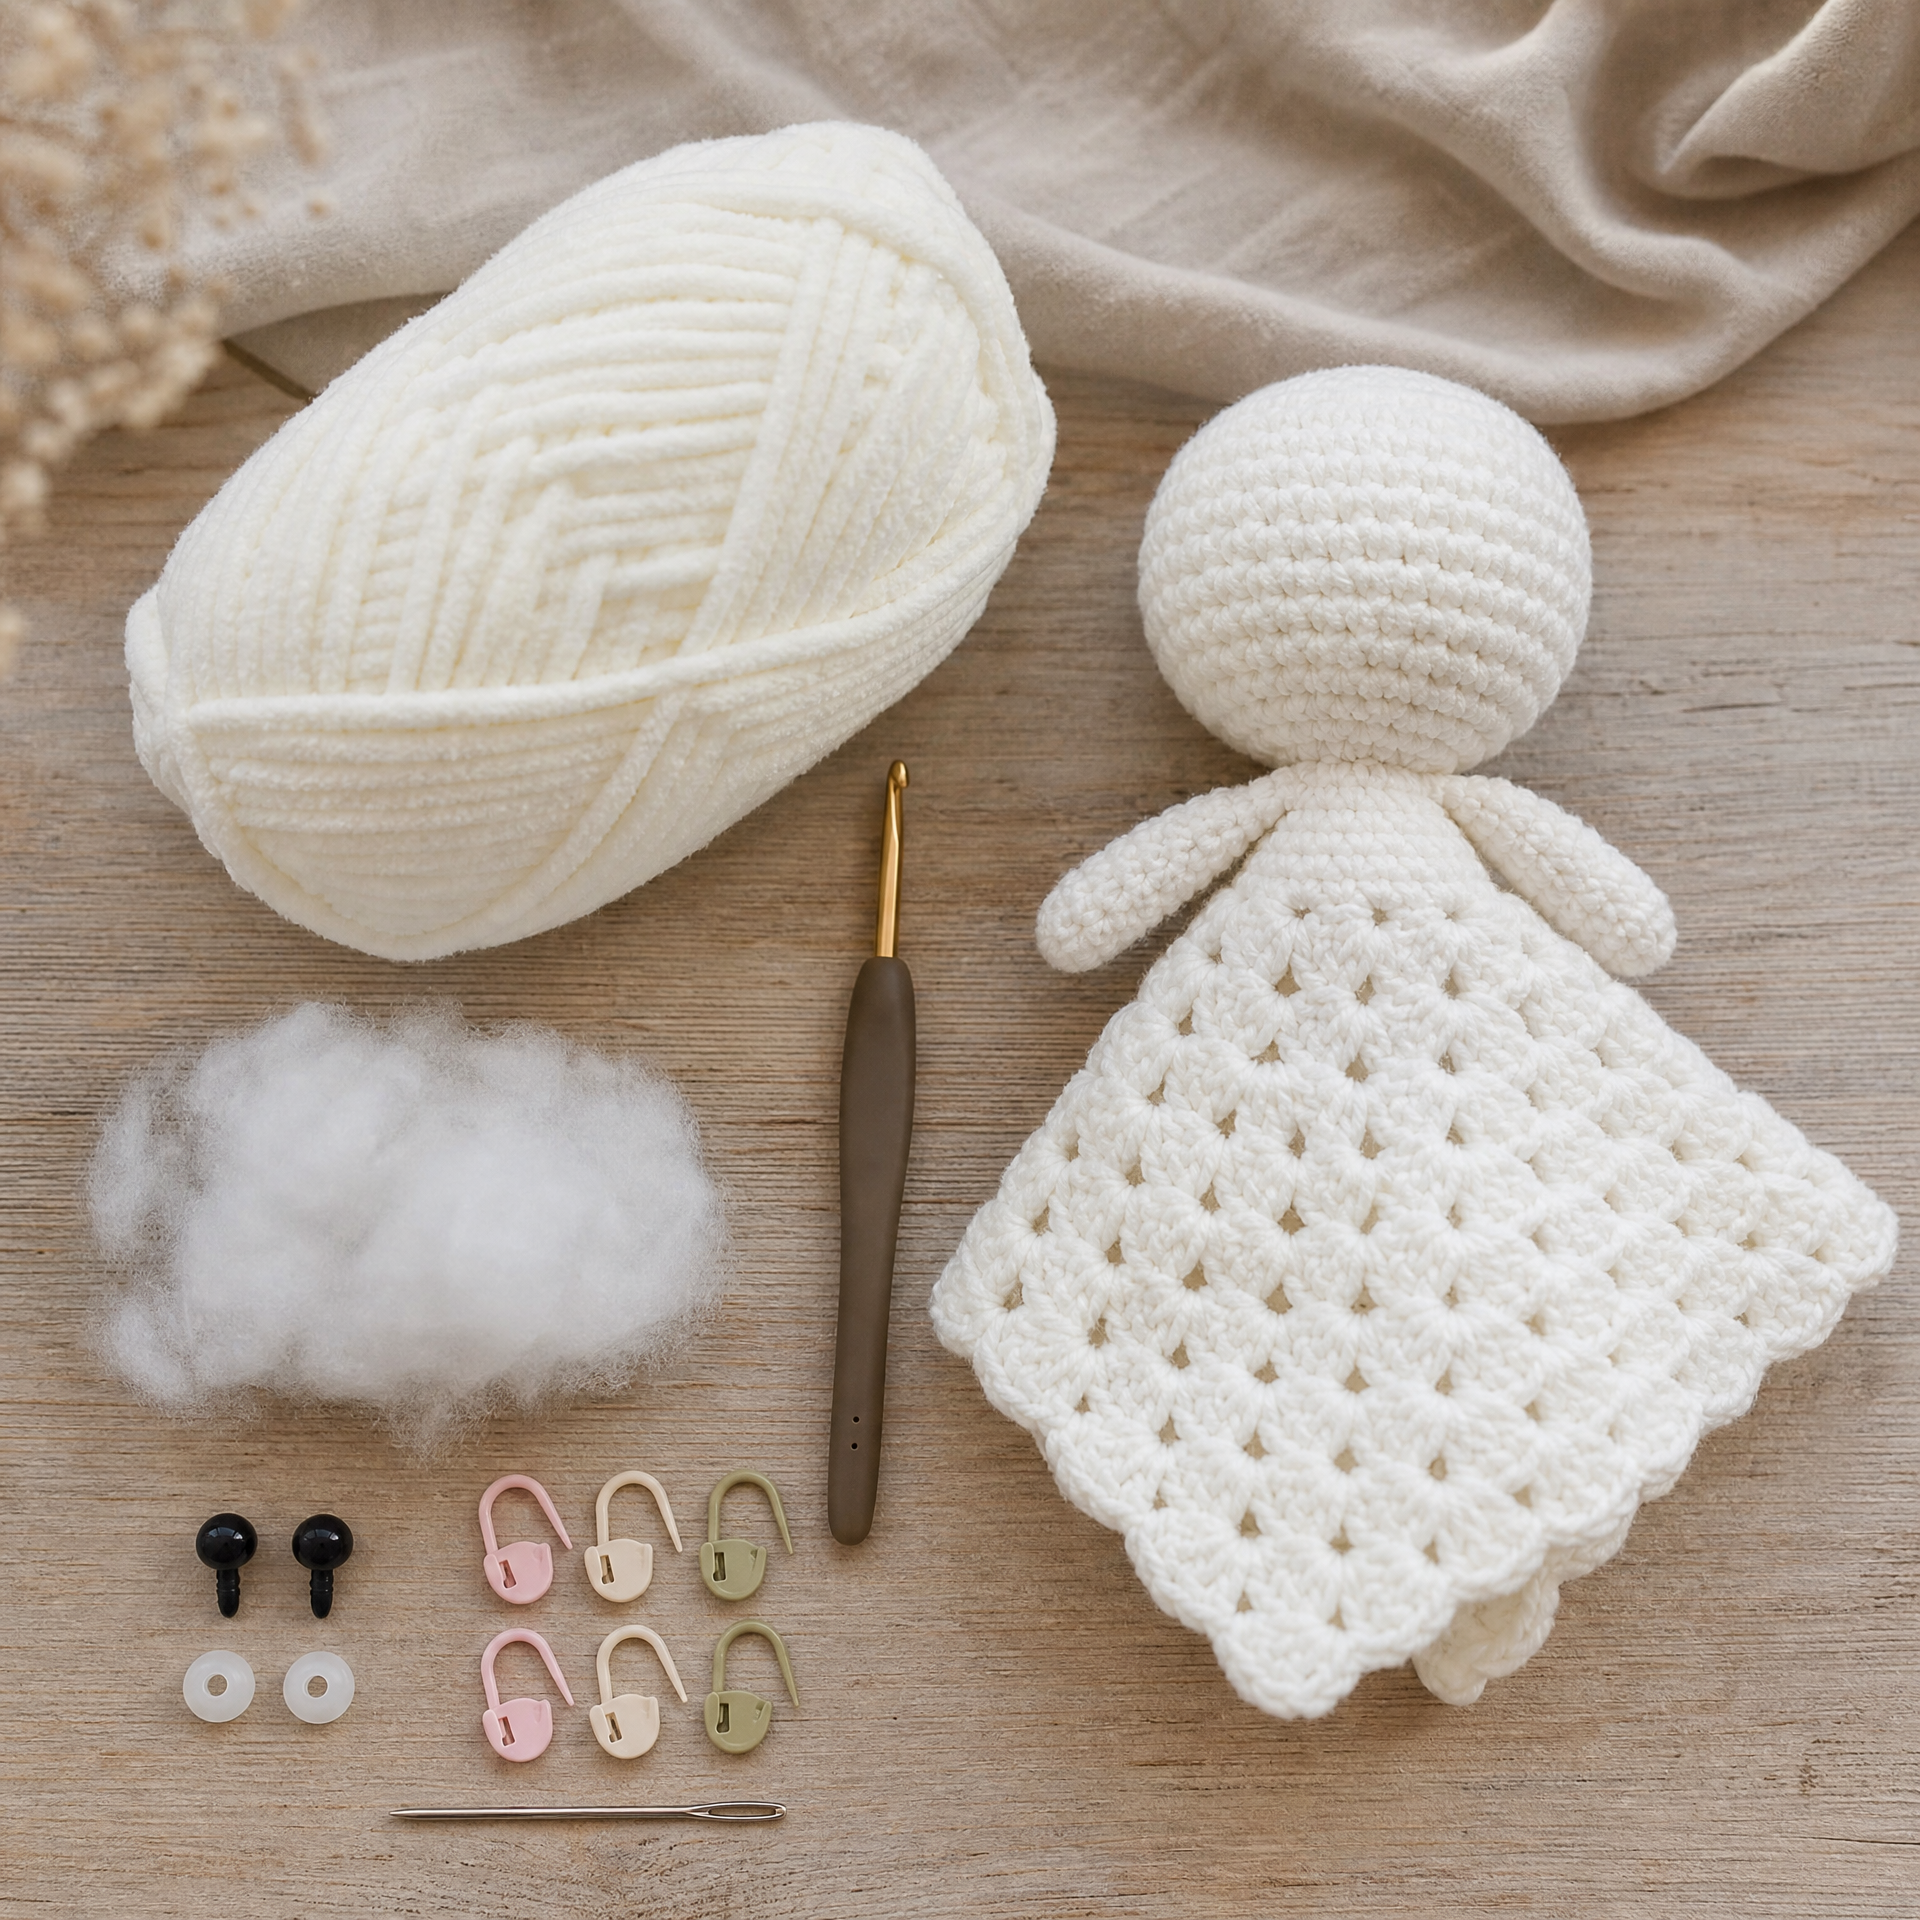
Photo prompt: Flat-lay of all materials needed for the amigurumi baby lovey pattern, including soft white yarn, a crochet hook, safety eyes, fiberfill, stitch markers, and a tapestry needle, arranged neatly on a light wood surface.
What You’ll Need
Skill Level: Beginner-Friendly Intermediate (you should be comfortable working in the round and basic increases/decreases)
Finished Size: Approximately 12 inches x 12 inches for the blanket portion, with the bunny head measuring about 4 inches across
Materials
- Worsted weight yarn (Category 4), approximately 200 yards in main color (MC, white or cream) and 50 yards in contrast color (CC, soft pink or gray) (I love using a soft cotton-acrylic blend for baby items. Check out my post on the best yarn for beginners if you need guidance on choosing a safe, washable option.)
- Size 5.0 mm (H/8) crochet hook
- 12 mm safety eyes, 2
- Polyester fiberfill stuffing
- Stitch markers
- Tapestry needle for weaving in ends
- Scissors
- Pink embroidery floss for nose
Gauge: 14 sc x 16 rows = 4 inches in single crochet (gauge is not critical for the blanket portion, but keeping it consistent will help the head look round and even)
Abbreviations
| Abbreviation | US Term |
|---|---|
| ch | chain |
| sc | single crochet |
| inc | increase (2 sc in same stitch) |
| dec | invisible decrease (sc2tog) |
| sl st | slip stitch |
| st(s) | stitch(es) |
| MR | magic ring |
| BLO | back loop only |
| dc | double crochet |
| hdc | half double crochet |
| ch-sp | chain space |
| MC | main color |
| CC | contrast color |
| rnd(s) | round(s) |
Pattern Notes
- The bunny head is worked in continuous rounds (do not join at the end of each round unless instructed). Use a stitch marker to track the beginning of each round.
- The blanket portion is worked in rows using a corner-to-corner inspired granny-style square. It is attached to the head at the end.
- Safety eyes should be inserted before the head is fully stuffed and closed. This is a step I have forgotten before, and it is not fun to try to wrestle them in late.
- This pattern is intended as a decorative and supervised comfort item. Always follow current safe sleep guidelines and supervise babies with any stuffed toy or soft item.
- If you are new to reading patterns like this one, my beginner’s guide to reading a crochet pattern is a great place to start before diving in.
- Yarn ends should be woven in securely, at least 2 to 3 inches, and double-knotted where possible for baby safety.
The Pattern: Step by Step
Part 1: Bunny Head (worked in MC)
Rnd 1: MR, 6 sc into ring. (6 sts)
Rnd 2: Inc in each st around. (12 sts)
Rnd 3: (Sc 1, inc) repeat 6 times. (18 sts)
Rnd 4: (Sc 2, inc) repeat 6 times. (24 sts)
Rnd 5: (Sc 3, inc) repeat 6 times. (30 sts)
Rnd 6: (Sc 4, inc) repeat 6 times. (36 sts)
Rnds 7 to 12: Sc in each st around. (36 sts)
Insert safety eyes between Rnds 8 and 9, approximately 8 stitches apart.
Rnd 13: (Sc 4, dec) repeat 6 times. (30 sts)
Rnd 14: (Sc 3, dec) repeat 6 times. (24 sts)
Begin stuffing firmly with fiberfill.
Rnd 15: (Sc 2, dec) repeat 6 times. (18 sts)
Rnd 16: (Sc 1, dec) repeat 6 times. (12 sts)
Rnd 17: Dec 6 times. (6 sts)
Fasten off, leaving a long tail. Use tapestry needle to close the opening by weaving through the front loops of the remaining 6 stitches and pulling tight. Weave in end securely.
Part 2: Bunny Ears (make 2, worked in MC with CC inner ear)
Outer Ear (MC):
Rnd 1: MR, 6 sc. (6 sts)
Rnd 2: Inc in each st. (12 sts)
Rnds 3 to 7: Sc in each st around. (12 sts)
Fasten off, leave a long tail for sewing.
Inner Ear (CC):
Rnd 1: MR, 4 sc. (4 sts)
Rnd 2: Inc in each st. (8 sts)
Rnds 3 to 5: Sc in each st around. (8 sts)
Fasten off, leave a tail. Do not stuff. Flatten the inner ear and sew it onto the front of the outer ear. Pinch the bottom of the ear slightly and sew both ears to the top of the head, approximately 4 stitches apart.
Part 3: Blanket Portion (worked in MC)
The blanket is worked in rows as a flat square using a simple granny-style block pattern.
Ch 4, sl st to form a ring.
Row 1: Ch 3 (counts as dc), 2 dc in ring, ch 2, 3 dc in ring, ch 1, turn. (One corner cluster made)
Row 2: Sl st to ch-2 sp, ch 3, 2 dc in same sp, ch 2, 3 dc in same sp, ch 1, sc in corner, ch 1, 3 dc in same sp, ch 2, 3 dc in same sp. Turn.
Continue expanding in this granny square fashion, adding one more cluster group per side each row, until the blanket measures approximately 12 inches x 12 inches (about 10 to 12 rows depending on your tension).
Finish with a border round: Join CC, sc evenly around all four sides, working 3 sc in each corner. Sl st to join, fasten off.
Optional: Add a second border round in MC for a clean finish.
Part 4: Assembling the Lovey
Find the center of the blanket. Position the finished bunny head at the center top edge. Using the long tail from the head and a tapestry needle, sew the head firmly to the blanket, stitching around the full base of the neck opening. Go around at least twice to make sure it is very secure. Weave in all ends carefully.
Embroider a small nose using pink embroidery floss just below the eyes. A simple Y-shape or triangle stitch works well.
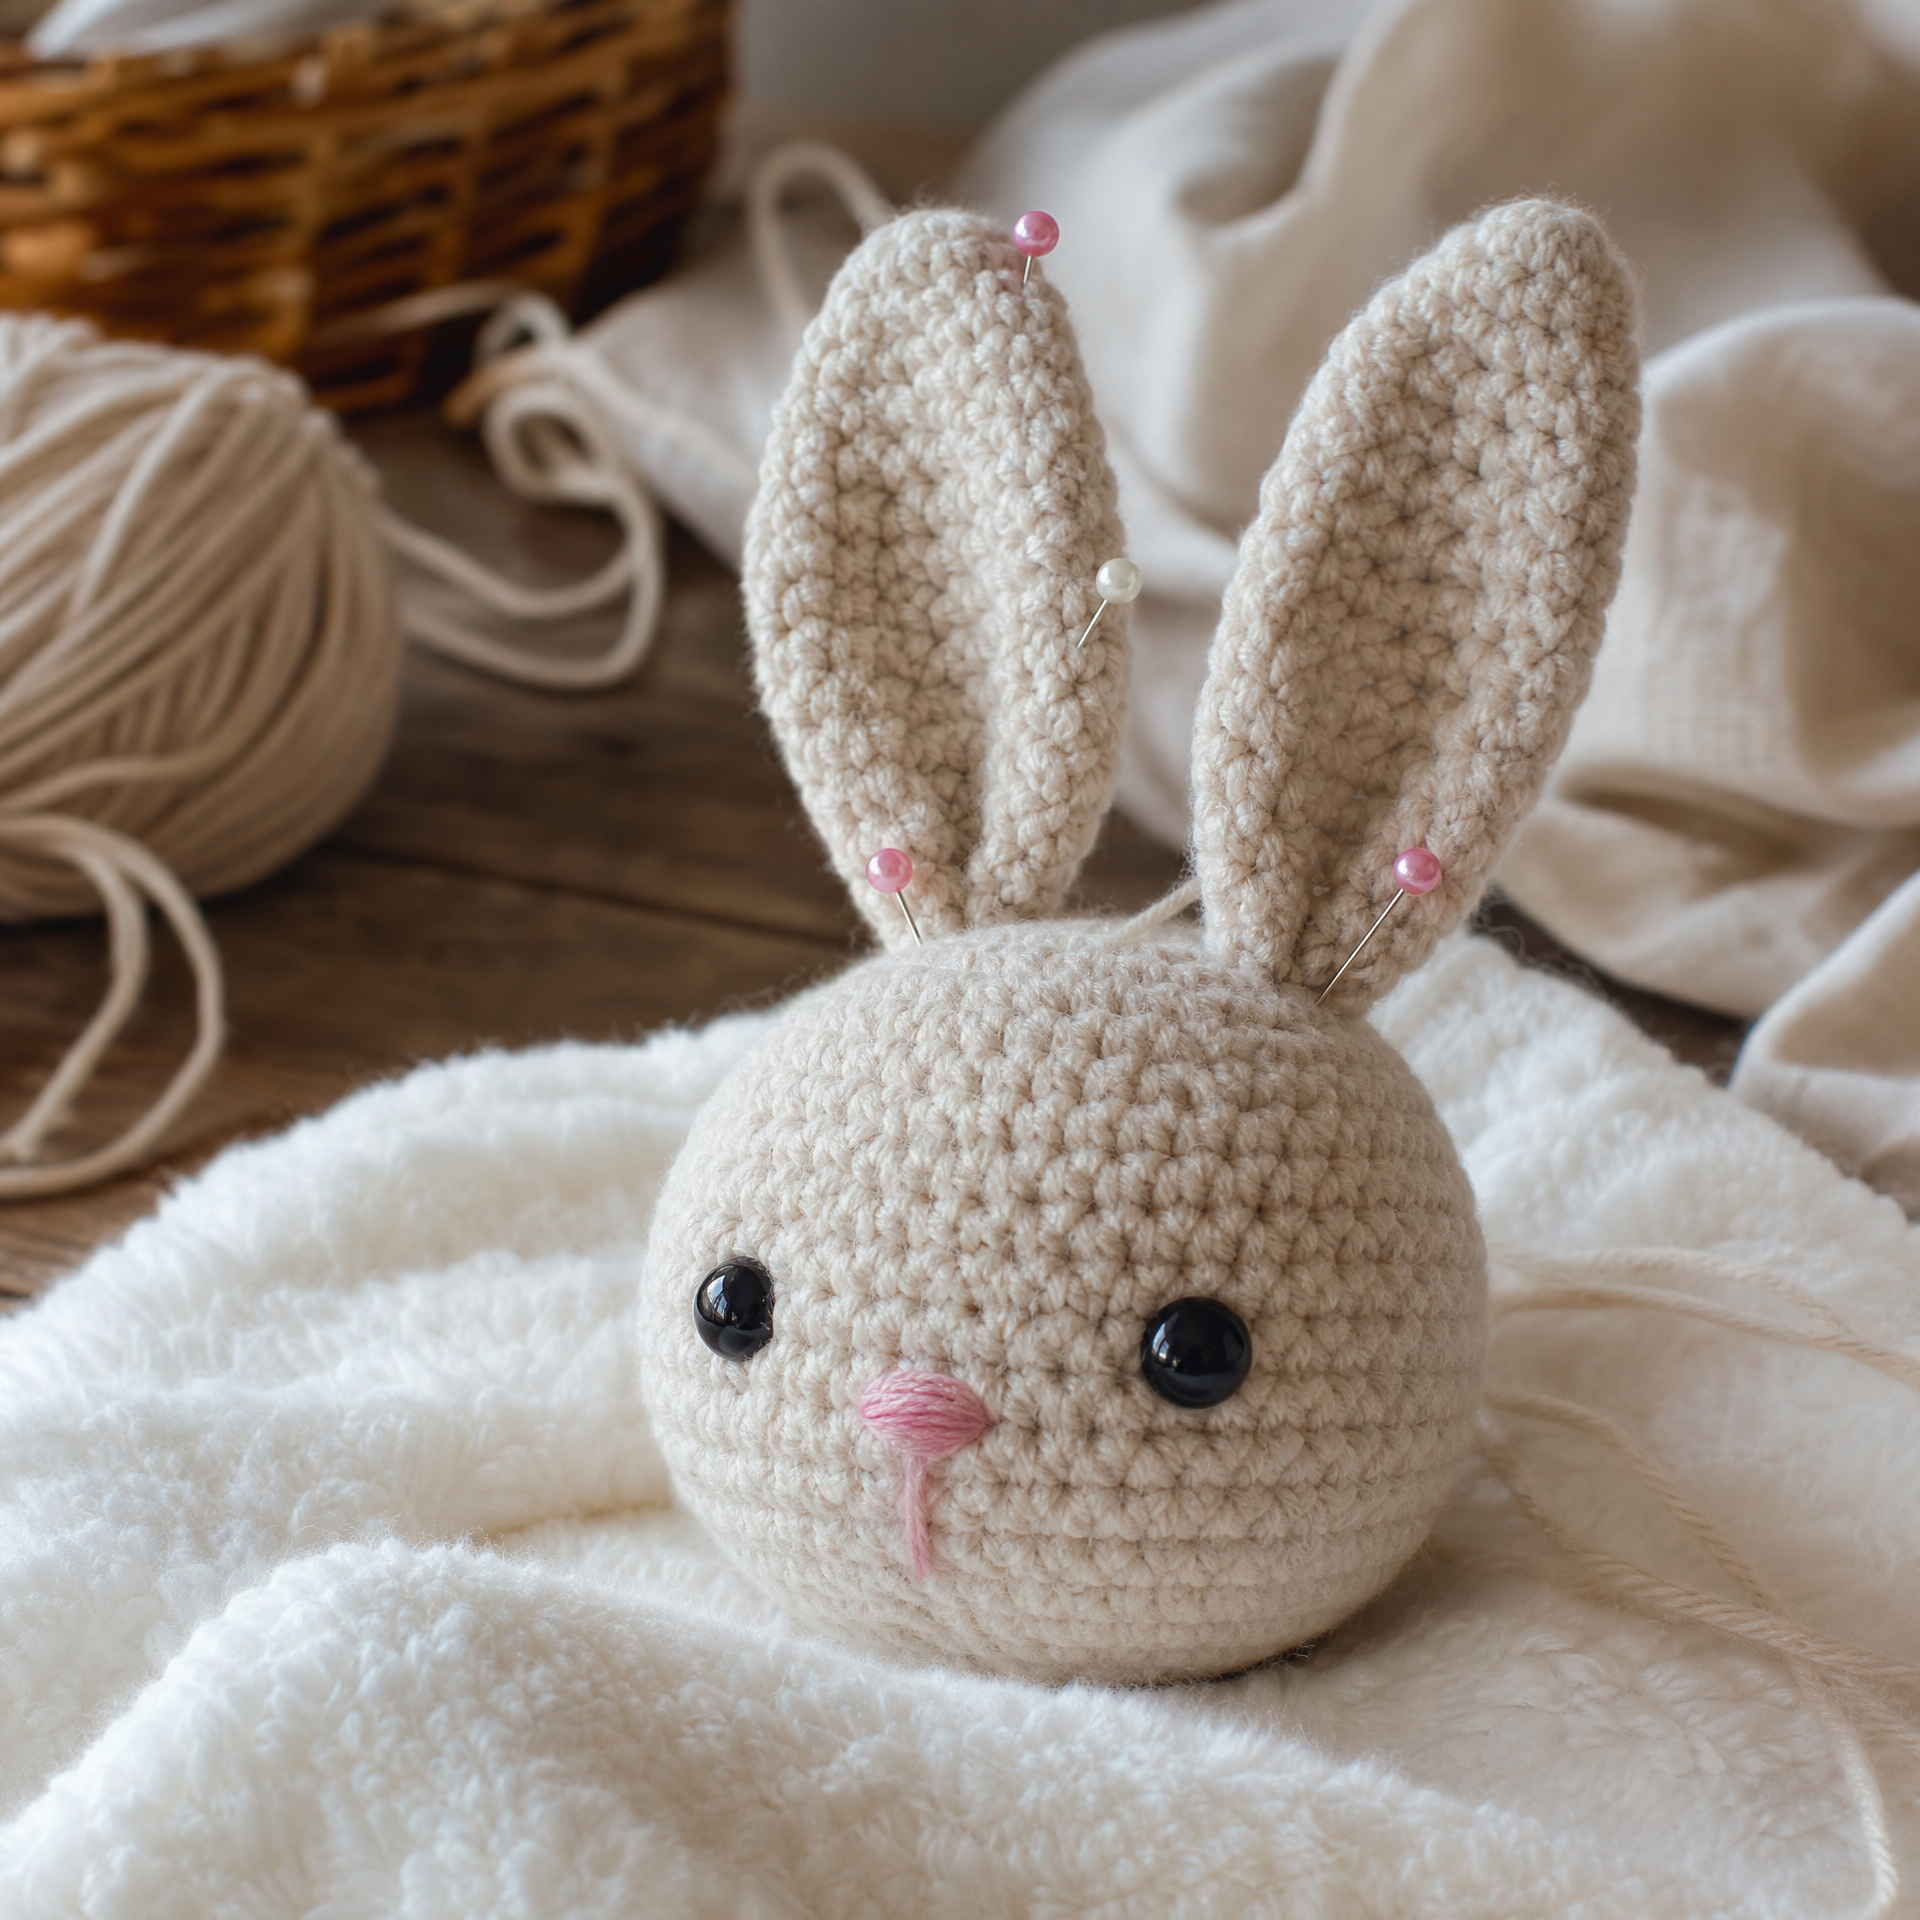
Photo prompt: Close-up of the amigurumi bunny head being assembled, showing the safety eyes inserted, the pink embroidered nose, and the ears pinned in place before sewing, resting on a soft white blanket texture.
My Experience and Practical Tips
I have made this lovey so many times that I feel like I have learned every possible lesson the hard way. Here are my most useful tips from all those hours of making.
Stuff the head firmly. The first time I made this, I went a little light on the stuffing because I did not want it to feel stiff. The head ended up looking a little droopy and sad once it was attached to the blanket. A nice firm, round head makes all the difference visually and gives babies something satisfying to hold.
Use a stitch marker religiously. Amigurumi worked in continuous rounds can go sideways fast if you lose track of your round starts. I once had to rip back almost four rounds because I miscounted. A simple safety pin as a stitch marker would have saved me that frustration. If you have made other mistakes like this, I found my own post on crochet mistakes beginners make and how to fix them really helpful to put together, and it might resonate with you too.
Double-check your eye placement before setting them. Once safety eyes are locked in, they are not coming back out without a fight. I like to pin them with straight pins first, stuff the head loosely, and hold it up to check the look before committing.
Wash your lovey before gifting it. Running it through a gentle machine wash in a mesh laundry bag before gifting is a great idea. It softens the yarn, removes any dye residue, and lets you check that everything holds together well.
Keep your blanket tension loose and relaxed. The blanket portion should have a little drape to it, not be stiff. If yours is coming out tight, try going up half a hook size for that section.
If you enjoy making amigurumi characters, you might also love my pattern for an easy amigurumi bunny, which uses a very similar construction and makes a great matching gift alongside this lovey.
Variations and Custom Sizing
One of the things I love most about this pattern is how easy it is to customize. Here are a few ways I have changed it up over the years.
Different animal heads: Swap the bunny ears for small round bear ears (simple flat circles) or cat ears (triangles) and you have a completely different character. The head base stays exactly the same.
Color options: Soft grays, lavenders, warm yellows, and mint greens all look beautiful for the blanket portion. I once made a deep blush pink lovey with a white bear head that was absolutely precious.
Larger blanket: For a bigger lovey (great for older babies or toddlers), simply keep adding granny rows until you reach your desired size. A 16 x 16 inch blanket works nicely for a slightly larger version.
Smaller lovey: Stop the blanket at about 8 x 8 inches for a mini version that tucks nicely in a diaper bag.
Yarn weight swap: Using a DK weight yarn (Category 3) with a 4.0 mm hook will give you a slightly smaller, denser lovey that some parents prefer.
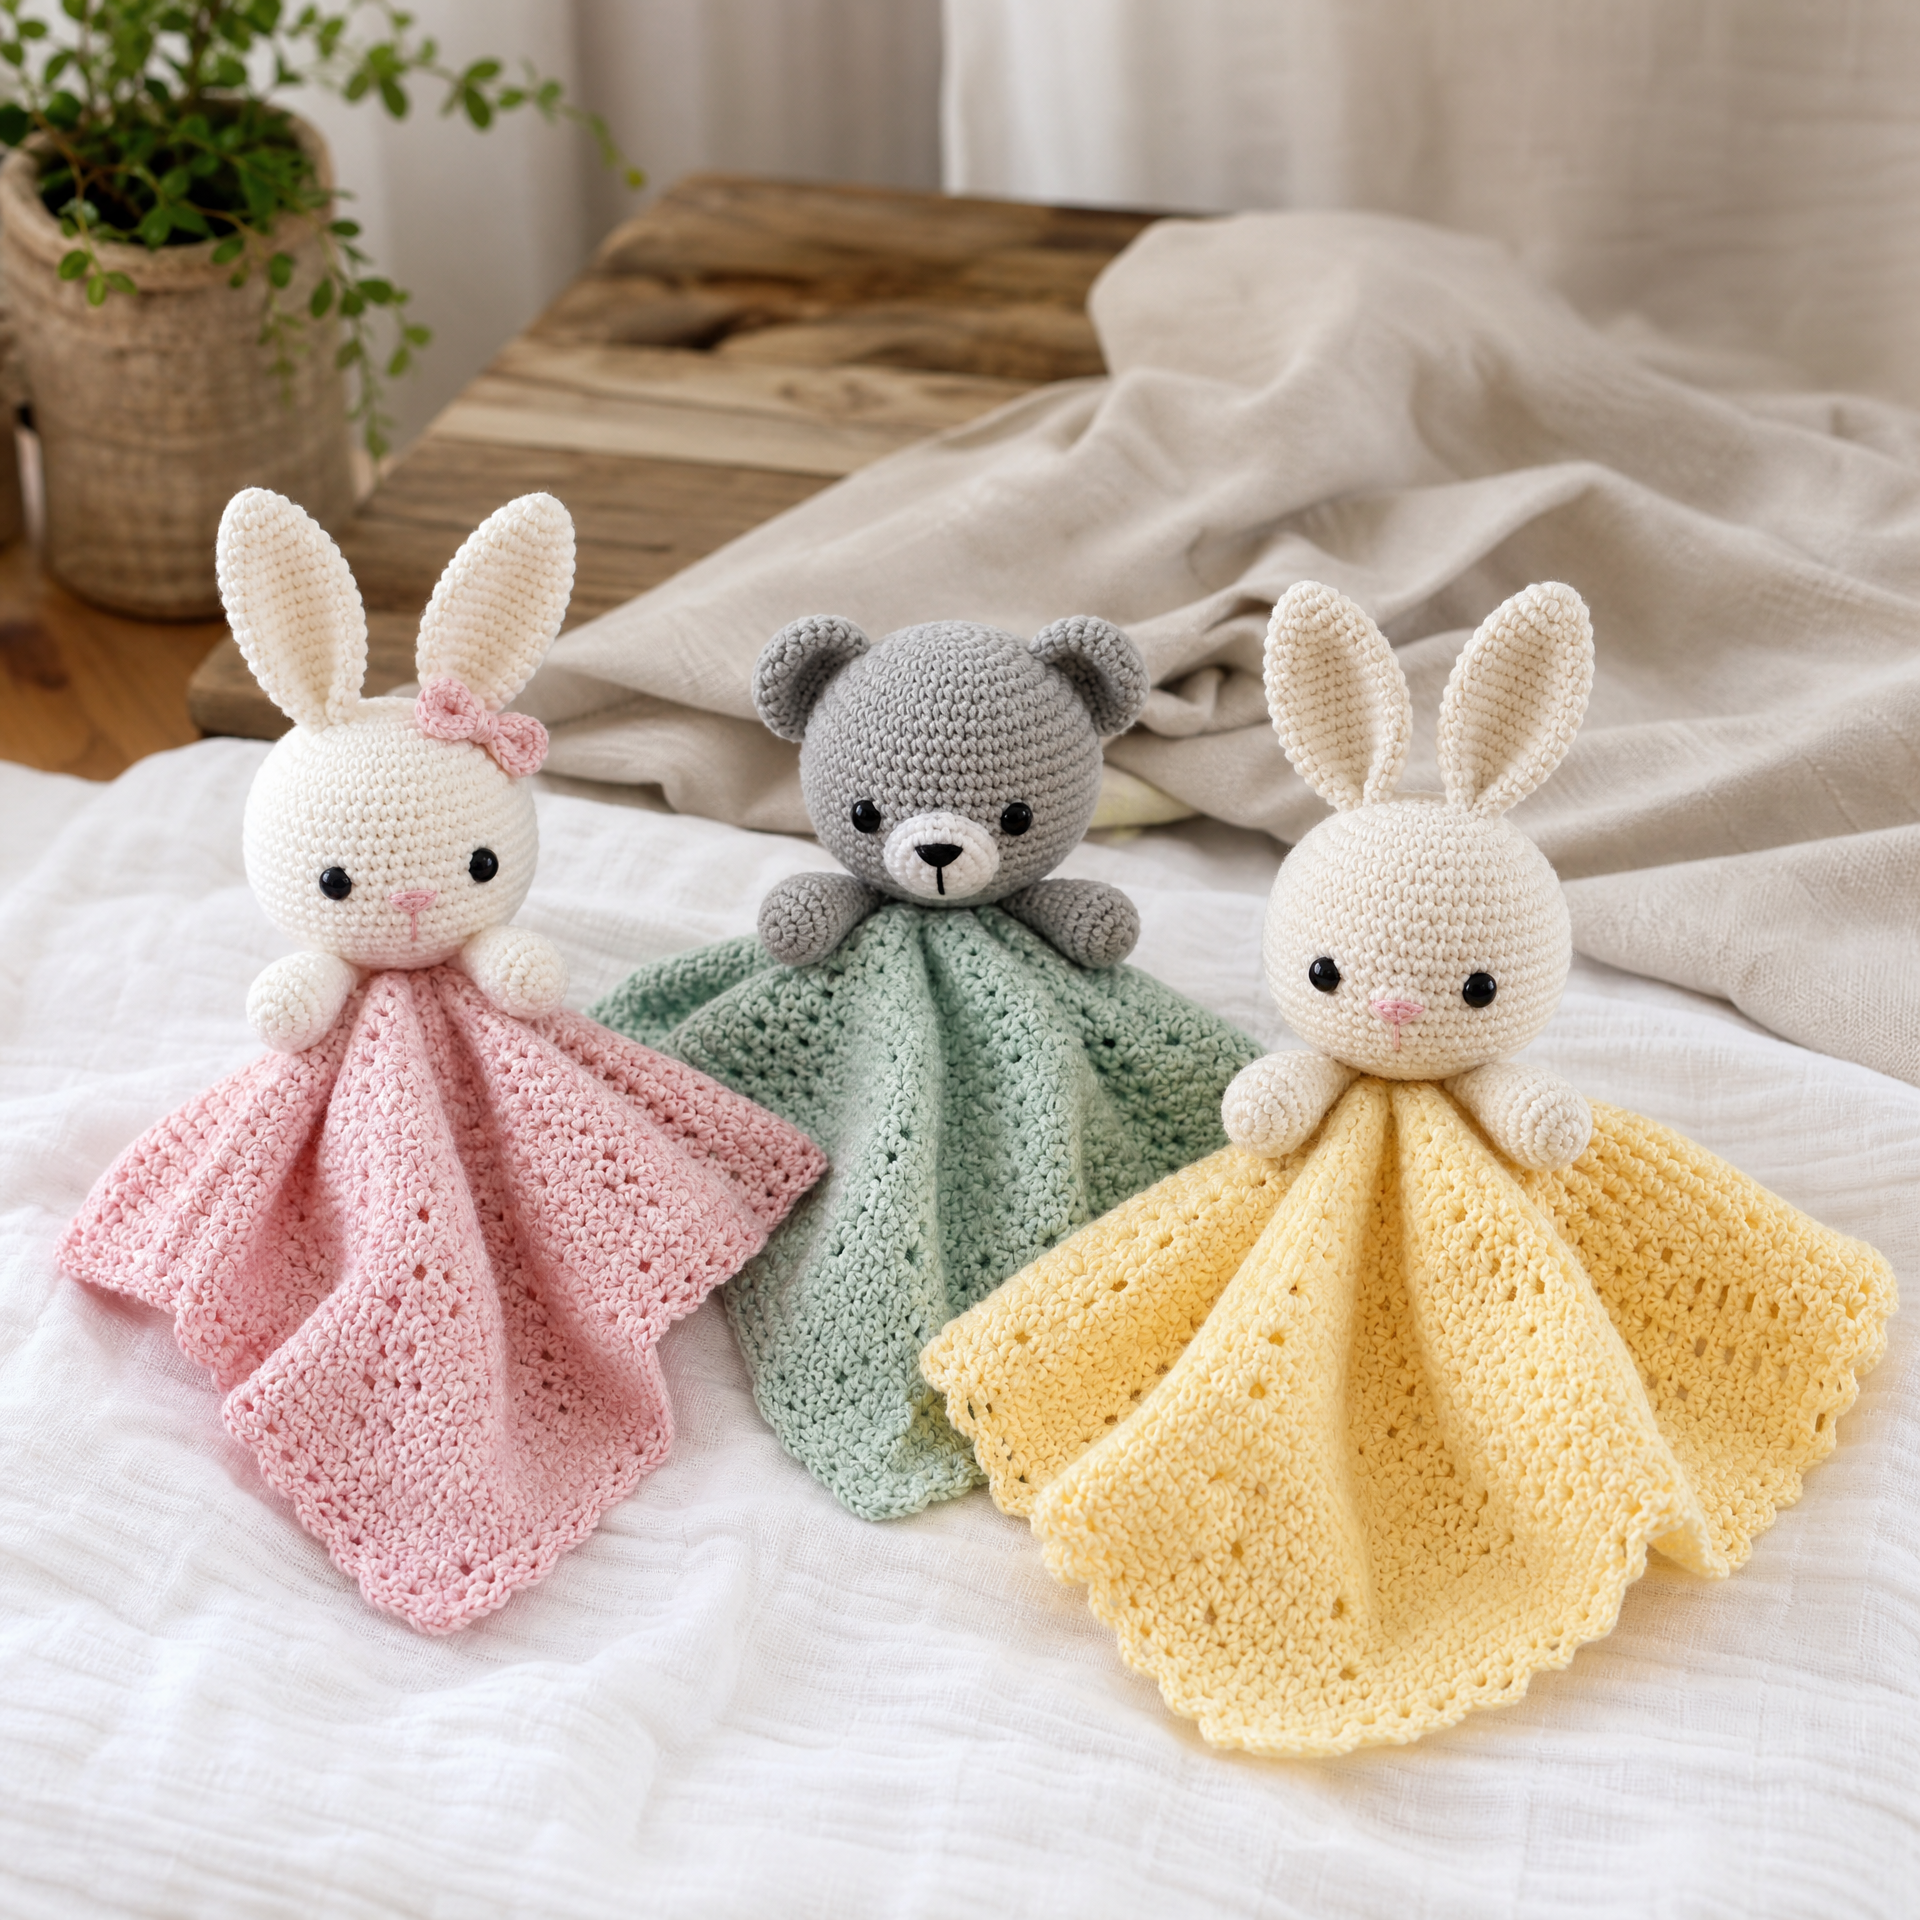
Photo prompt: Three finished amigurumi baby loveys in different color combinations (white bunny on pink blanket, gray bear on mint blanket, cream bunny on yellow blanket) arranged together on a soft white surface, showing variation options.
FAQ
Is this lovey safe for newborns?
As with all handmade soft toys, this lovey should always be used under adult supervision, especially with very young babies. Safety eyes are securely fastened, but if you want to be extra cautious, you can embroider the eyes instead of using plastic safety eyes. Always follow current pediatric safe sleep guidelines.
What yarn do you recommend for a baby lovey?
I strongly recommend a machine-washable, baby-safe yarn. Look for options labeled “baby” or “soft” that are free from harsh dyes and easy to launder. Cotton-acrylic blends and superwash merino are both excellent choices. Avoid anything scratchy or with loose fibers that could shed.
How do I attach the head to the blanket securely?
Use the long yarn tail left at the base of the head to sew it to the center of the blanket with a tapestry needle. Go around the full base of the head at least twice, pulling firmly. Finish with a double knot and weave the tail through several stitches inside the head before trimming. The attachment should not wiggle or pull free.
Can I make this with bulky yarn for a faster project?
You can, but keep in mind that the head will come out larger and the texture of the blanket will change quite a bit. If you try bulky yarn, go up to a 6.0 mm or 6.5 mm hook and reduce your stitch counts slightly to keep the head proportional. The overall lovey will be chunkier and more pillow-like.
How long does this project take to complete?
For most crocheters with some experience, expect around 4 to 6 hours total. The head and ears take about 1.5 to 2 hours, and the blanket portion takes another 2 to 3 hours depending on size. It is a great weekend project or a spread-over-a-week gift make.
Final Thoughts
This amigurumi baby lovey pattern has truly become one of my all-time favorite makes. There is something so sweet about combining the cozy comfort of a little security blanket with the whimsy of an amigurumi character, and the result is always something that feels genuinely special. Whether you are making this for a shower gift, a new family member, or just because you want to practice your amigurumi skills, I really hope you love working through it as much as I do.
If you give this pattern a try, I would absolutely love to hear how it goes. Drop a comment below and tell me what color combination you chose, what animal head you made, or any tweaks you came up with. I read every single comment and it genuinely makes my day to see what you all create.
And if you found this pattern helpful, please save it to your Pinterest boards so you can find it again later and share it with other crochet-loving friends. Happy hooking, friends!