
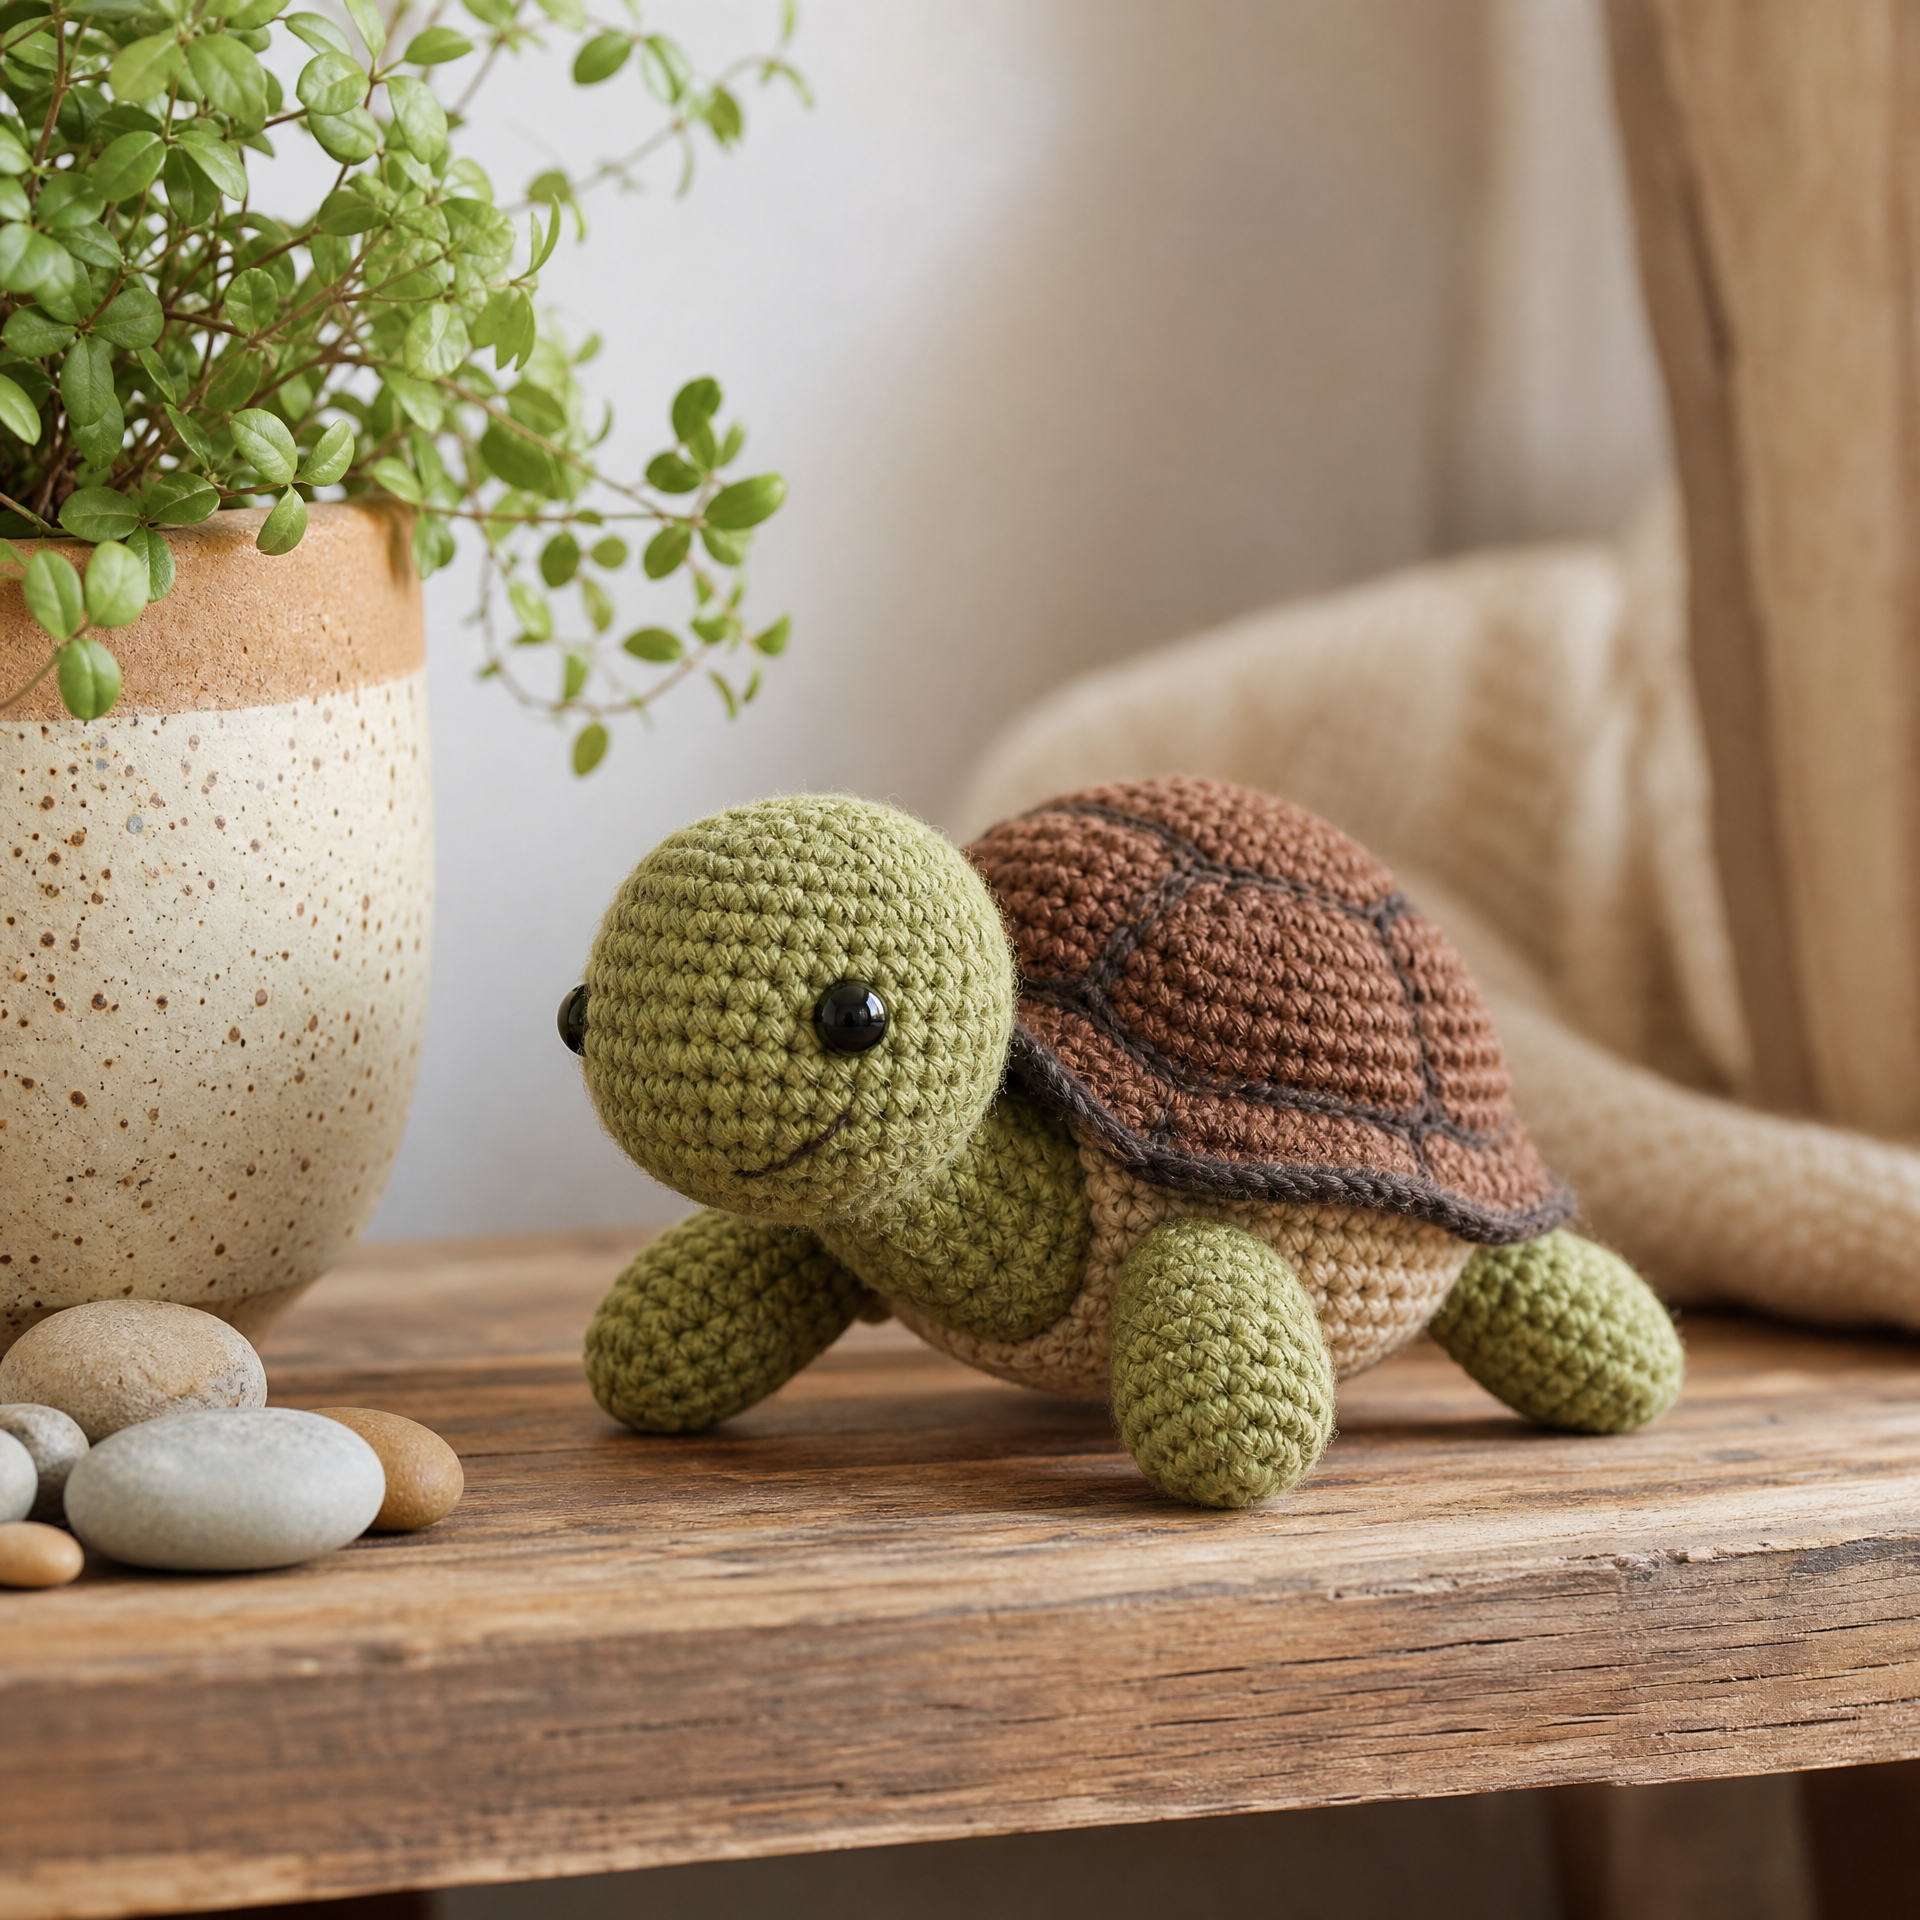
I still remember the first amigurumi turtle I ever made. It was a gift for my neighbor’s little girl, and I was so nervous about getting the shell shape right that I actually crocheted it three times before I was happy. That was about four years ago, and now this little turtle is honestly one of my most-made patterns. I’ve gifted them at baby showers, tucked them into Easter baskets, and even kept one on my desk because he just makes me smile every time I sit down to work. There is something so satisfying about crocheting a tiny creature that looks genuinely adorable when it’s done. If you’ve never tried amigurumi before, this turtle is the perfect starting point. And if you’re a seasoned amigurumi maker, I think you’ll love how quick this little guy comes together. Grab your hook and let’s get started!
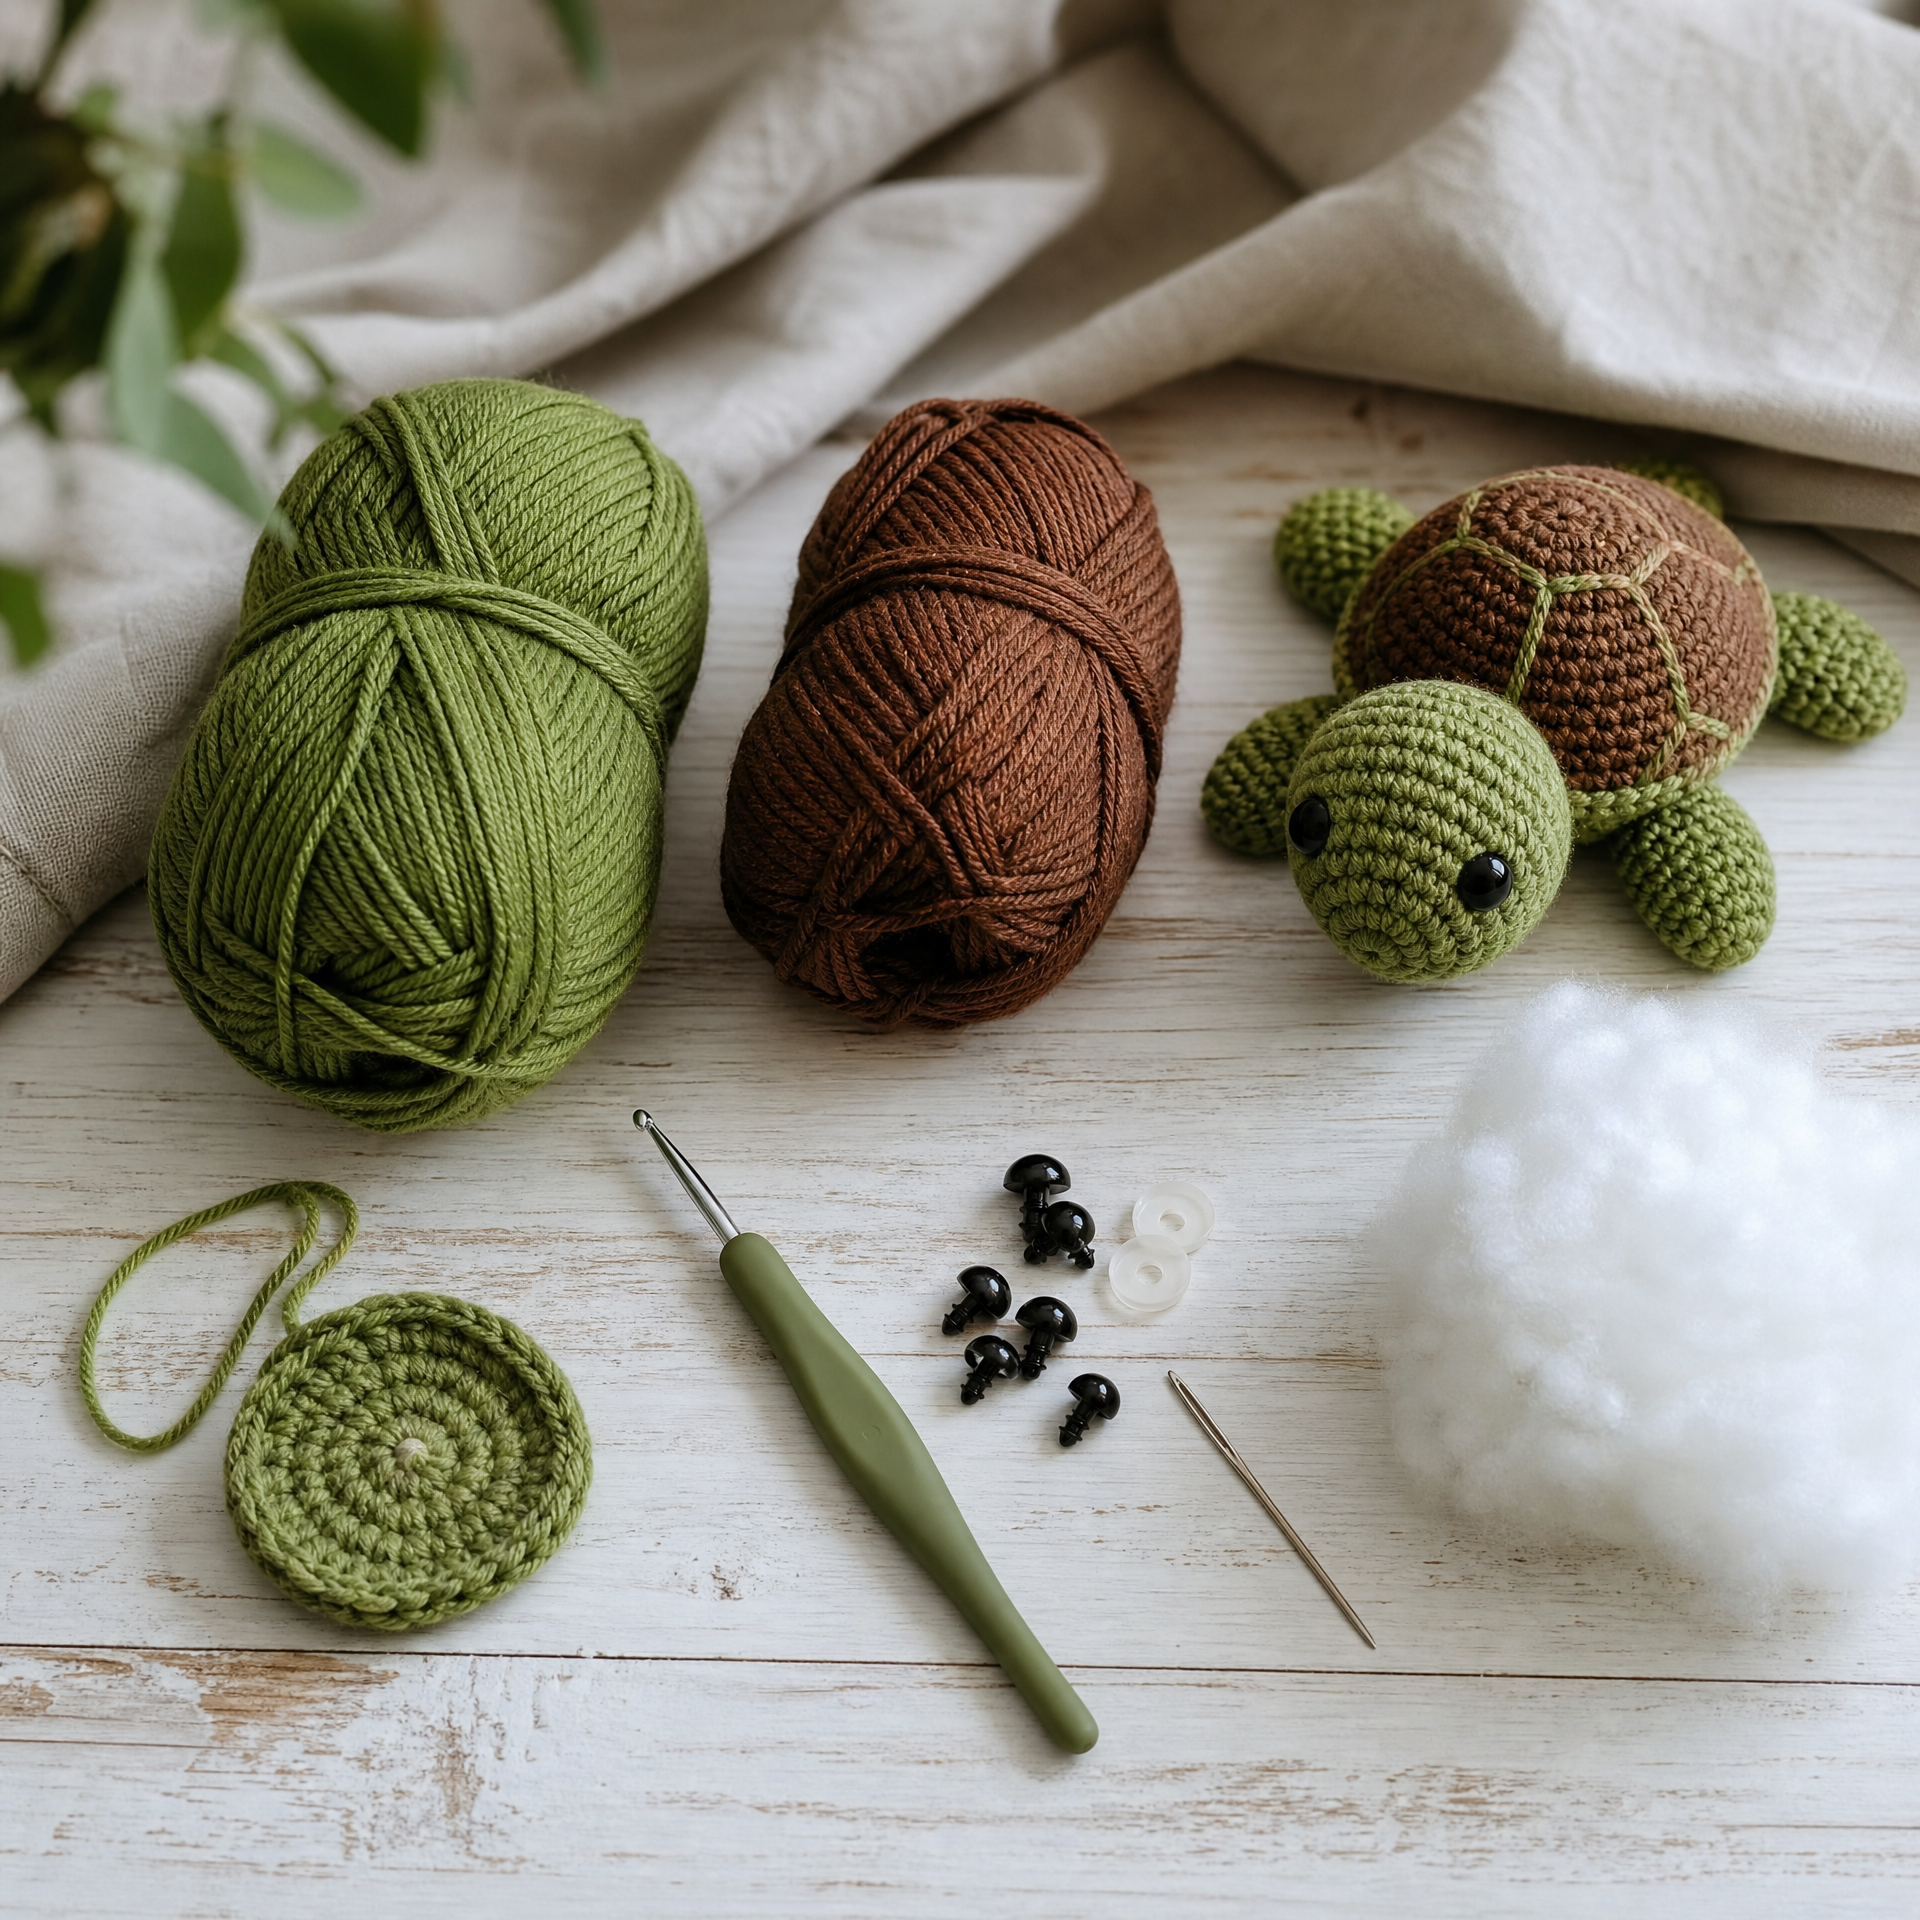
Photo prompt: Flat-lay of crochet materials for the amigurumi turtle project, including green and brown yarn skeins, a 3.5mm crochet hook, safety eyes, polyfill stuffing, and a tapestry needle arranged on a white wooden surface.
What You’ll Need
Skill Level: Beginner to Intermediate. You should be comfortable crocheting in the round and doing basic increases and decreases. If you’re brand new to reading patterns, I recommend checking out How to Read a Crochet Pattern: A Beginner’s Guide before diving in.
Finished Size: Approximately 4 inches long and 3 inches tall (including the shell) when made with the recommended yarn and hook.
Materials:
- Worsted weight yarn (Category 4) in green (for the body, head, legs, and tail) and brown or dark green (for the shell). I used about 40 yards of green and 30 yards of brown.
- 3.5mm crochet hook
- Two 9mm black safety eyes
- Polyester fiberfill stuffing
- Tapestry needle for weaving in ends and sewing pieces together
- Stitch markers (I use the locking kind)
- Scissors
Gauge: 4 sc x 4 rows = 1 inch. Gauge is not critical for this project, but keeping your tension consistent will give you a neater finished turtle. Tighter tension is actually preferred for amigurumi so the stuffing doesn’t show through.
Abbreviations
| Abbreviation | US Term |
|---|---|
| ch | chain |
| sc | single crochet |
| inc | increase (2 sc in the same stitch) |
| dec | invisible decrease (sc2tog through front loops) |
| sl st | slip stitch |
| MR | magic ring |
| BLO | back loop only |
| FLO | front loop only |
| st(s) | stitch(es) |
| rnd | round |
| rep | repeat |
| pm | place marker |
Pattern Notes
- All pieces are worked in continuous rounds unless otherwise noted. Do not join rounds unless the pattern says to. Use a stitch marker to keep track of the beginning of each round.
- The shell is worked separately and sewn onto the body at the end.
- Leave long yarn tails when finishing each piece. You’ll use those tails to sew the parts together, which saves you from having to thread a new piece of yarn onto your needle each time.
- Stuff the body and head firmly as you go. Don’t wait until you’re almost done closing up a piece to add stuffing. I learned that the hard way and ended up with a lumpy head on my second turtle!
- Safety eyes should be inserted and secured before closing up the head. Once the stuffing is in, you can’t get them in properly.
- This pattern uses US crochet terminology throughout.
The Pattern: Step by Step
Body (Make 1, in Green)
Rnd 1: MR, 6 sc into ring. (6 sts)
Rnd 2: Inc in each st around. (12 sts)
Rnd 3: (Sc 1, inc) rep around. (18 sts)
Rnd 4: (Sc 2, inc) rep around. (24 sts)
Rnd 5: (Sc 3, inc) rep around. (30 sts)
Rnd 6: (Sc 4, inc) rep around. (36 sts)
Rnds 7 to 10: Sc in each st around. (36 sts)
Rnd 11: (Sc 4, dec) rep around. (30 sts)
Rnd 12: (Sc 3, dec) rep around. (24 sts)
Stuff the body firmly now.
Rnd 13: (Sc 2, dec) rep around. (18 sts)
Rnd 14: (Sc 1, dec) rep around. (12 sts)
Rnd 15: Dec around. (6 sts)
Fasten off, leaving a long tail. Close the opening and weave in the end.
Head (Make 1, in Green)
Rnd 1: MR, 6 sc into ring. (6 sts)
Rnd 2: Inc in each st around. (12 sts)
Rnd 3: (Sc 1, inc) rep around. (18 sts)
Rnd 4: (Sc 2, inc) rep around. (24 sts)
Rnds 5 to 8: Sc in each st around. (24 sts)
Insert safety eyes between rounds 5 and 6, about 6 stitches apart. Stuff the head firmly.
Rnd 9: (Sc 2, dec) rep around. (18 sts)
Rnd 10: (Sc 1, dec) rep around. (12 sts)
Rnd 11: Dec around. (6 sts)
Fasten off, leaving a long tail for sewing.
Legs (Make 4, in Green)
Rnd 1: MR, 6 sc into ring. (6 sts)
Rnd 2: Inc in each st around. (12 sts)
Rnds 3 to 4: Sc in each st around. (12 sts)
Rnd 5: (Sc 1, dec) rep around. (8 sts)
Rnds 6 to 9: Sc in each st around. (8 sts)
Lightly stuff the leg. Flatten the opening and sc across through both layers (4 sts). Fasten off, leaving a long tail.
Tail (Make 1, in Green)
Rnd 1: MR, 4 sc into ring. (4 sts)
Rnds 2 to 5: Sc in each st around. (4 sts)
Fasten off, leaving a long tail for sewing. No stuffing needed.
Shell (Make 1, in Brown)
Rnd 1: MR, 6 sc into ring. (6 sts)
Rnd 2: Inc in each st around. (12 sts)
Rnd 3: (Sc 1, inc) rep around. (18 sts)
Rnd 4: (Sc 2, inc) rep around. (24 sts)
Rnd 5: (Sc 3, inc) rep around. (30 sts)
Rnd 6: (Sc 4, inc) rep around. (36 sts)
Rnd 7: Working in BLO, sc in each st around. (36 sts)
Rnds 8 to 12: Sc in each st around. (36 sts)
Rnd 13: (Sc 4, dec) rep around. (30 sts)
Stuff the shell lightly. You want it to hold its dome shape but not be too stiff.
Rnd 14: (Sc 3, dec) rep around. (24 sts)
Rnd 15: (Sc 2, dec) rep around. (18 sts)
Fasten off, leaving a long tail. Do not close completely. The open bottom will be sewn onto the body.
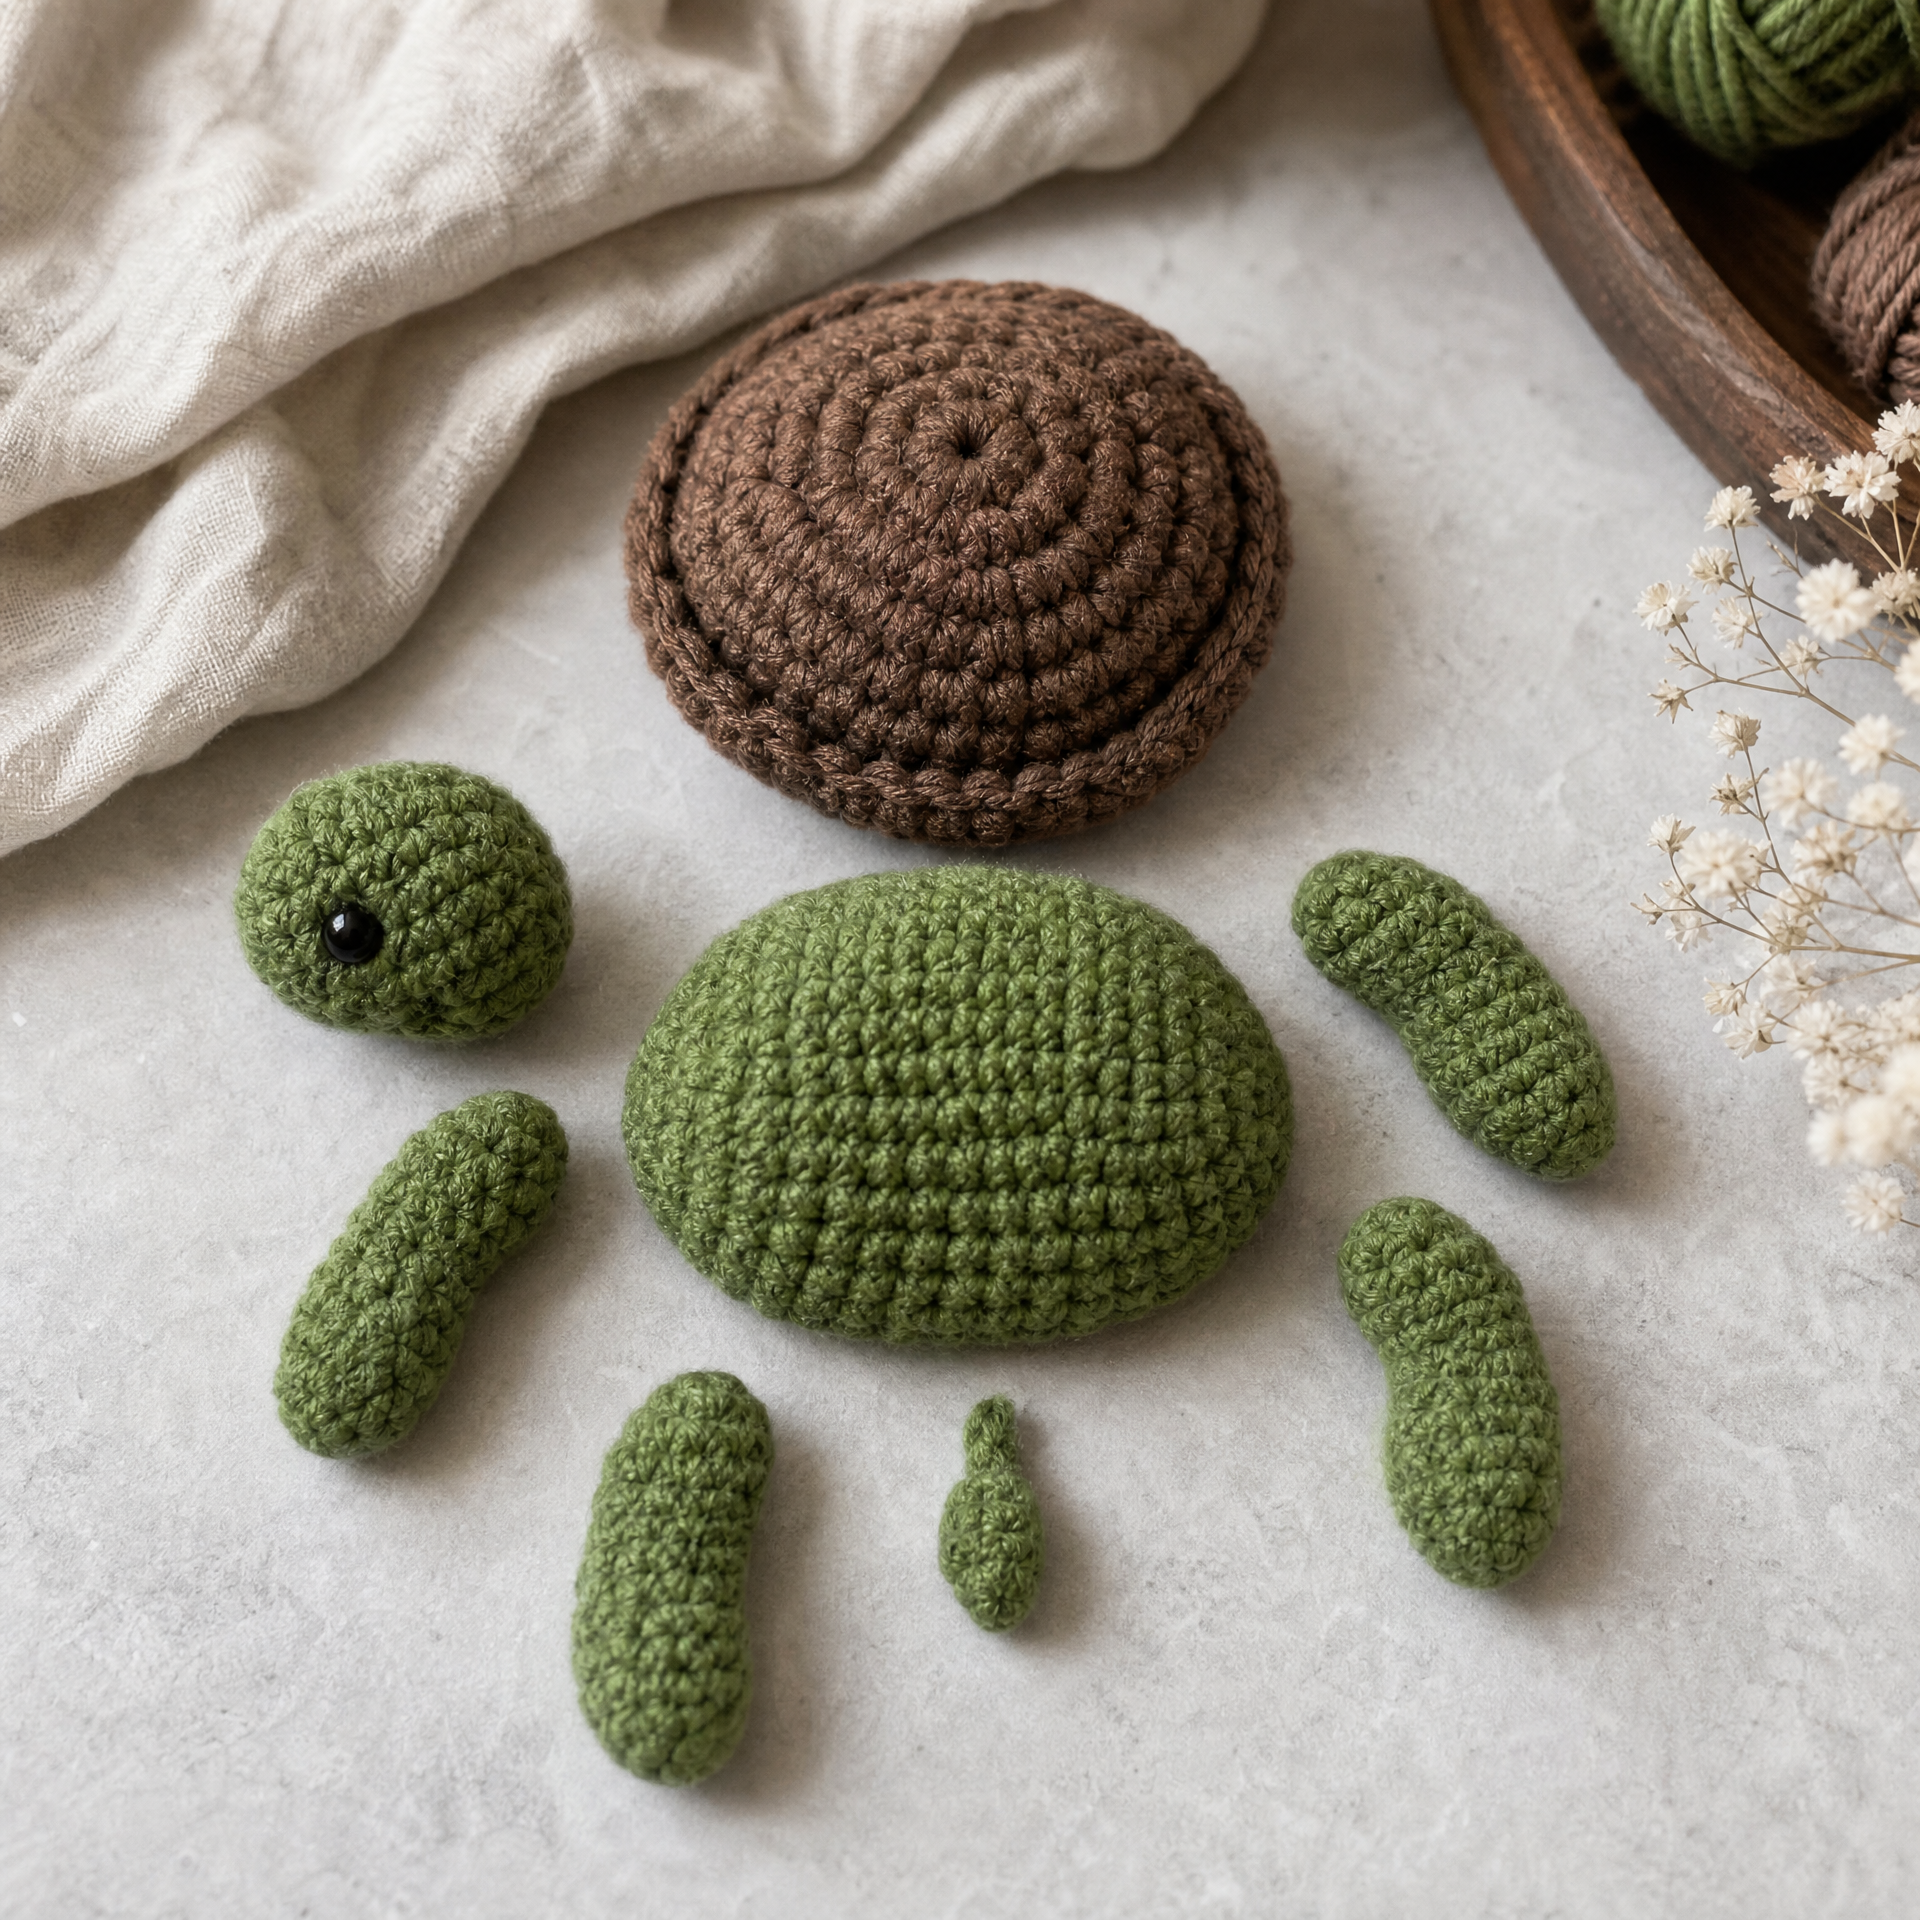
Photo prompt: Close-up flat-lay of the crocheted amigurumi turtle pieces laid out separately before assembly: the round brown shell, green oval body, small green head, four legs, and tiny tail, arranged on a light gray surface.
Assembly
- Pin the shell onto the top center of the body and sew it down firmly all the way around. Take your time here. Rushing this step is what caused my turtle to look lopsided on my first attempt.
- Sew the head onto the front of the body, centered under the shell edge.
- Sew the four legs onto the underside of the body, one in each corner area, pointing slightly outward.
- Sew the tail onto the back of the body, centered and pointing slightly downward.
- Weave in all remaining ends.
My Experience and Practical Tips
I’ve made this turtle pattern so many times that I could probably do the shell in my sleep. But the first few times, I definitely hit some snags. Here are the things I wish I had known from the start.
Don’t skip the magic ring: I know some beginners prefer a simple chain-2 start, but for amigurumi the magic ring really does give you a cleaner center. The hole that a chain start leaves is noticeable on such small pieces. If you haven’t mastered the magic ring yet, there are great video tutorials available and it’s worth spending ten minutes to practice it once.
Use the invisible decrease: The standard sc2tog leaves a small hole in amigurumi. The invisible decrease (working through the front loops only of two consecutive stitches) closes up much more neatly. I didn’t know this trick for my first several amigurumi projects and my finished pieces always looked a bit holey. It makes a real difference.
Stuff as you go: I mentioned this in the pattern notes but I’ll say it again here because I keep seeing new crocheters skip this. Waiting until the last few rounds to stuff means you’re fighting with the opening to shove fiberfill in. Stuff in stages and your results will be much smoother.
Yarn color matters more than you think: I made a version of this turtle in a variegated green yarn once and the stitch definition was almost impossible to see. Solid colors or very subtle heather yarns work best for amigurumi so the texture and shaping shows up clearly.
If you enjoy making little crocheted creatures, you might also love my Small Crochet Cat Amigurumi Free Pattern, which uses a very similar construction style and is just as fast to work up.
One more tip: pin your pieces in place before sewing. I use plain straight pins to try different positions for the head and legs before committing with yarn. It only takes a minute and saves so much frustration.
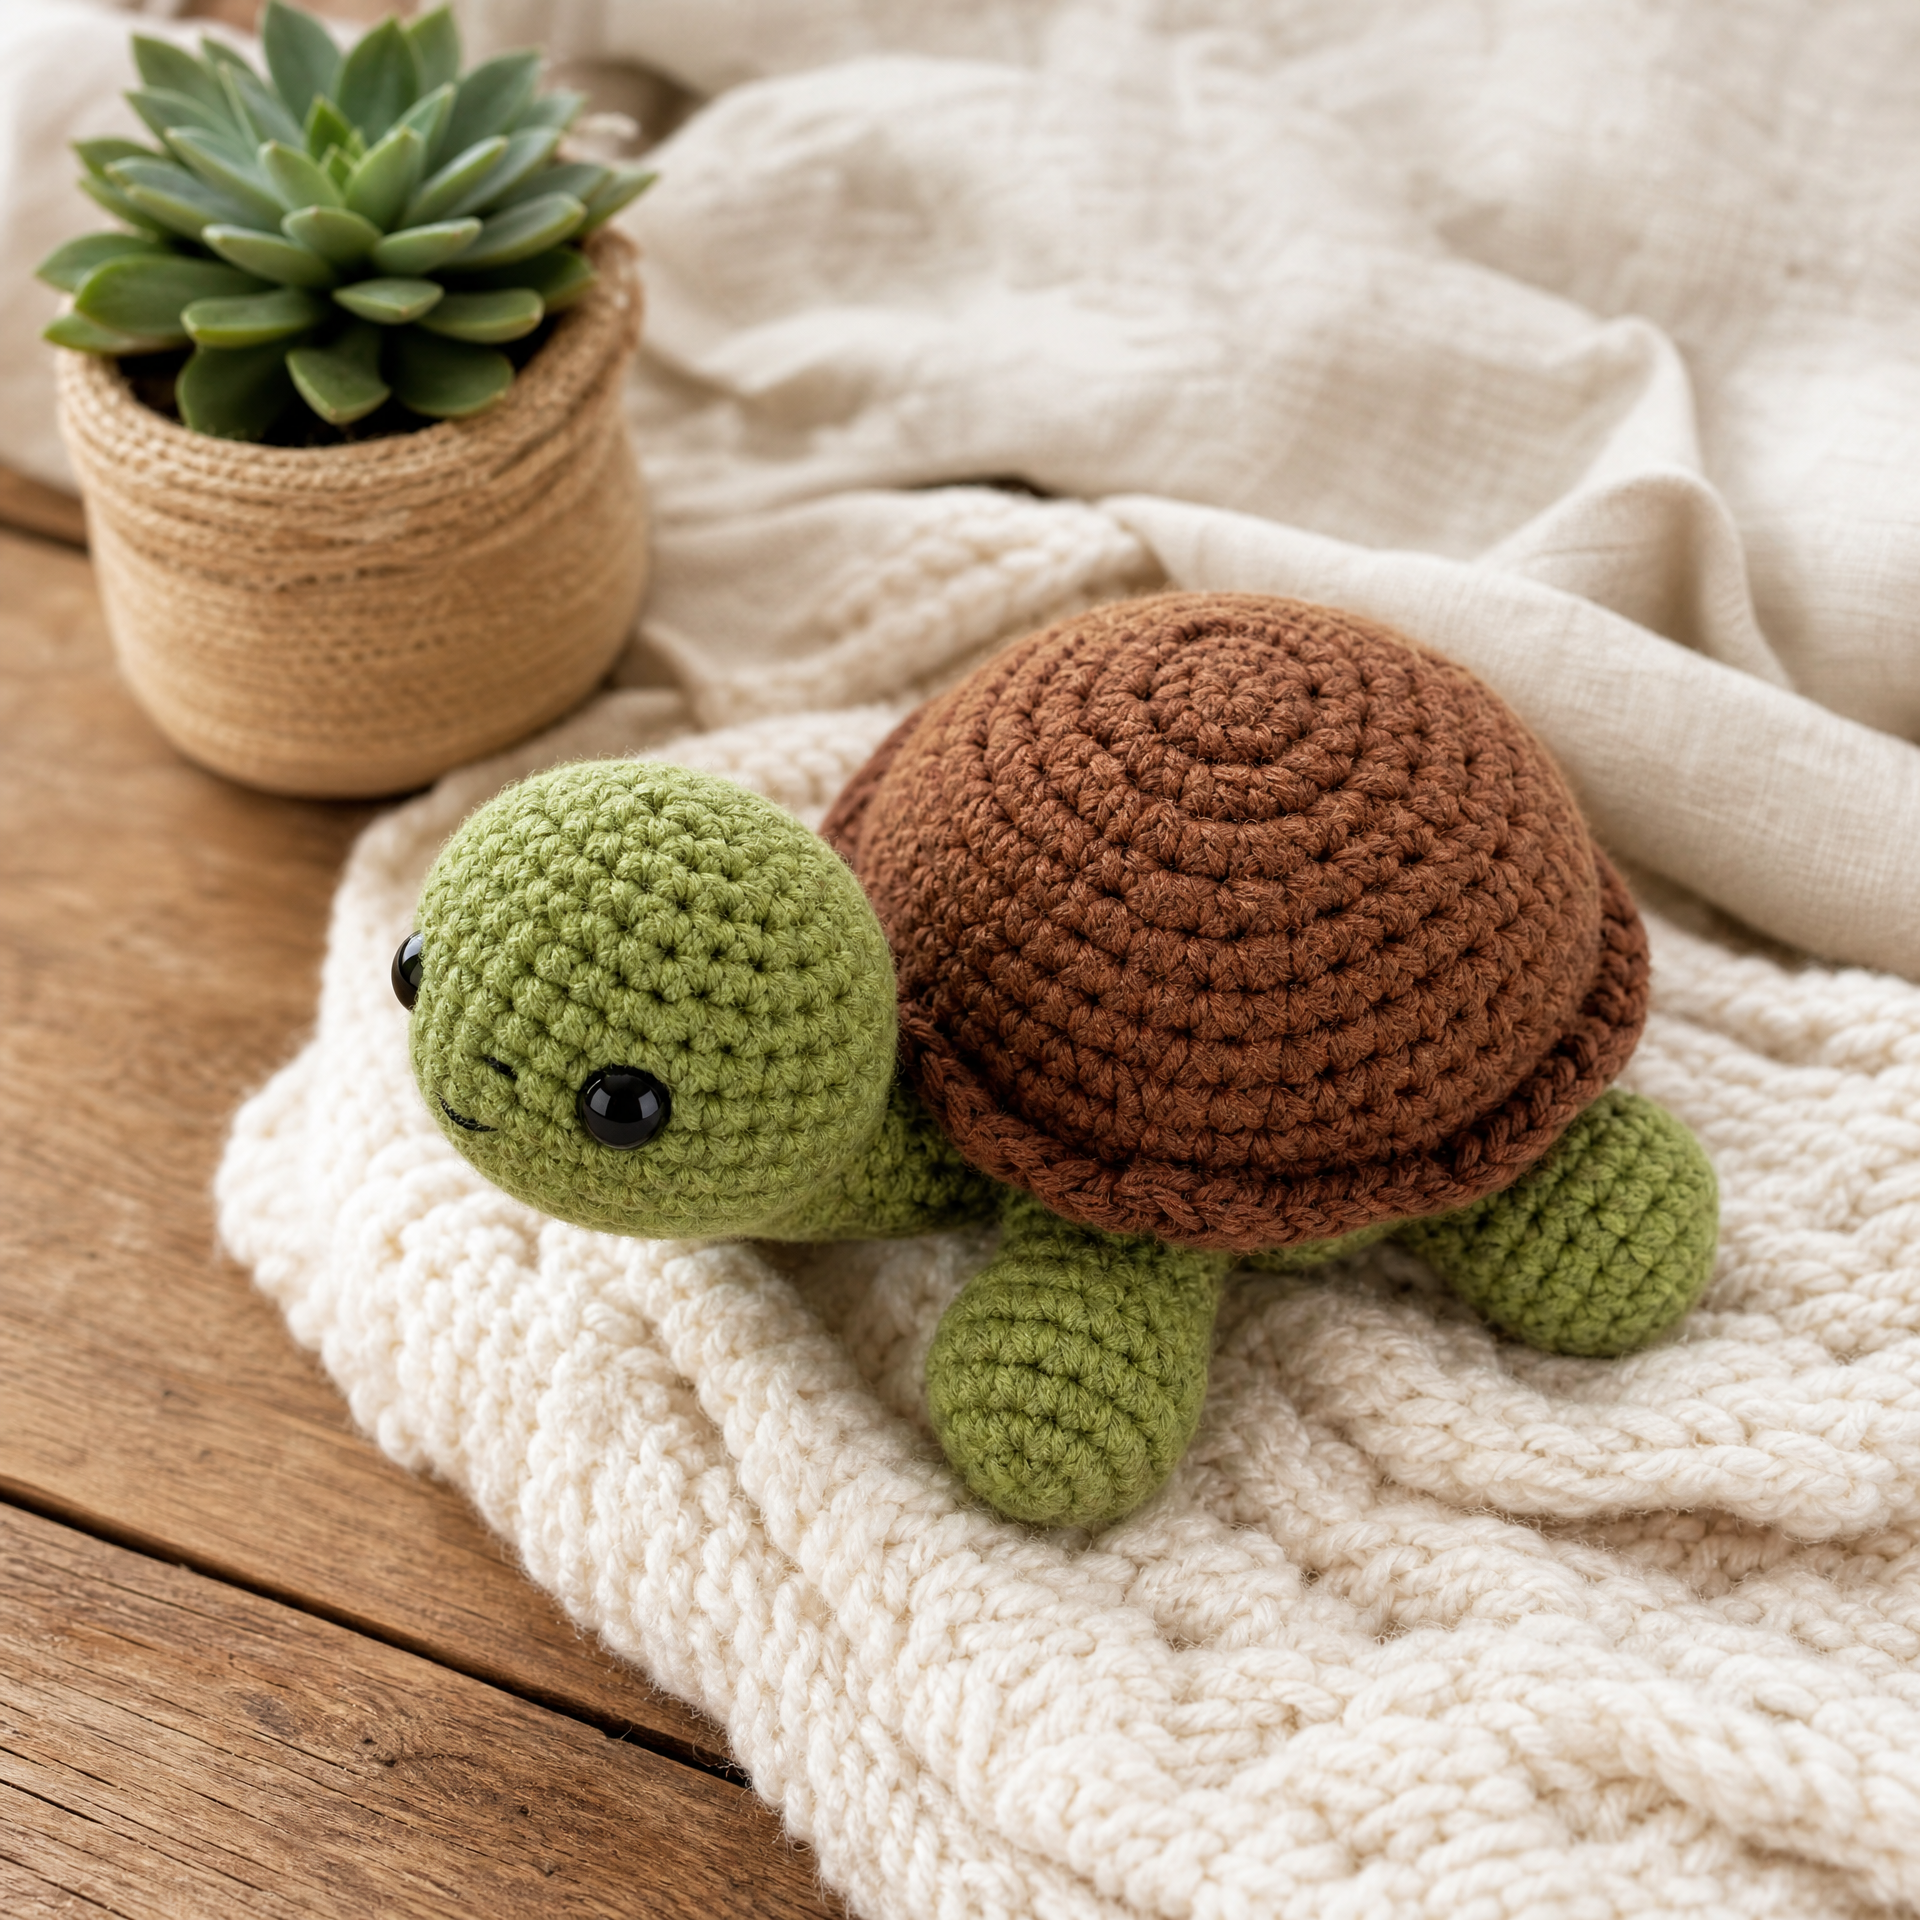
Photo prompt: A finished amigurumi turtle sitting upright on a cozy knit blanket near a small potted succulent, photographed from slightly above to show the domed brown shell and green body detail in warm natural light.
Variations and Custom Sizing
One of my favorite things about this pattern is how easy it is to customize.
Go smaller: Use fingering weight yarn (Category 1) with a 1.5mm or 2mm hook and you’ll get a turtle that’s only about 2 inches long. These tiny versions make adorable keychains or bag charms. Just be aware that small safety eyes might not be appropriate for very young children, so embroider the eyes with black yarn instead if the turtle is for a baby.
Go bigger: Use bulky yarn (Category 5 or 6) with a 5mm or 6mm hook for a much larger turtle. I made one in super bulky yarn as a floor toy and it came out about 8 inches long. It used a lot more stuffing than I expected, so stock up if you go that route.
Change the shell color: A bright teal shell with a lime green body looks really fun. I’ve also made a version with a speckled brown shell yarn that looked incredibly realistic.
Add texture to the shell: You can work surface slip stitches on the finished shell to create a hexagon or pentagon pattern that looks like actual turtle shell segments. It takes maybe 15 extra minutes and the effect is really impressive.
If you’re brand new to crochet and some of this feels overwhelming, don’t worry. You might find it helpful to read through my thoughts on 10 Crochet Mistakes I Made as a Beginner (And How to Fix Them) before starting. Knowing what to watch out for makes such a difference.
FAQ
Can I make this turtle without safety eyes?
Absolutely. If the turtle is for a child under 3, you should skip the safety eyes entirely since they can be a choking hazard. Instead, use a small amount of black yarn to embroider simple oval or round eyes onto the head after assembly. A satin stitch works nicely. You can also use black felt circles secured with a tiny dab of fabric glue if embroidery isn’t your thing.
What yarn do you recommend for this project?
I usually reach for Lion Brand Vanna’s Choice or Red Heart Super Saver for amigurumi because they’re affordable, widely available, and come in a huge range of colors. Both are worsted weight and work up nicely with a 3.5mm hook. If you want something softer (especially for a baby gift), Paintbox Simply DK is a great option, though you’ll need to adjust your hook size down slightly. For more of my thoughts on yarn selection, check out my guide on the best yarn for beginners.
How long does this project take to complete?
For me, the turtle takes about 3 to 4 hours from start to finish, including all the assembly. If you’re newer to amigurumi, budget closer to 5 or 6 hours, especially since you’ll probably work more slowly on the decreasing rounds to make sure your stitch count stays right. It’s a great one-evening project once you’ve made it once or twice.
My stitch count keeps going off. What am I doing wrong?
This is the most common amigurumi problem I see! The most likely culprits are: accidentally working into the joining slip stitch as if it were a regular stitch, missing the last stitch of a round (it hides under your stitch marker sometimes), or miscounting your increases. I’d suggest placing your stitch marker in the very first stitch of each new round rather than the last, and counting your stitches at the end of every round until you get comfortable. Using a row counter app on your phone helps too.
Can I sell finished turtles made from this pattern?
Yes! You’re welcome to sell finished items made from this free pattern. I just ask that you credit Crochet at Home as the pattern source if you’re selling online and someone asks where you got the pattern. Please do not copy, resell, or redistribute the written pattern itself as your own. Thank you so much for supporting independent crochet designers!
Final Thoughts
This little amigurumi turtle has brought so much joy into my crafting life, and I genuinely hope it does the same for you. Whether you’re making it as a gift, a decoration, or just because you needed a fun weekend project, I think you’re going to love how it turns out. The first one might take a little patience, but by the second or third turtle you’ll be flying through the rounds.
If you make one, I would absolutely love to see it! Drop a comment below and tell me how it went. Did you make any fun color changes? Did you run into any snags I can help you troubleshoot? I read every single comment and reply to as many as I can.
And if you want to save this pattern to come back to later, please go ahead and save it to your Pinterest boards! It really helps other crocheters find free patterns, and I’m so grateful every time someone shares. Happy crocheting, friends!